Horsehair plaster, also known as lath and plaster, is typically found in older homes and homes of significant historical value. This practice is not commonly used today. In fact, drywall began replacing the process in the 1950s. However, you can still find a lot of homes with horsehair plaster.
If you’ve never heard of horsehair plaster before, then you’re probably pretty confused. So, what is horsehair plaster? Why is it called horsehair plaster?
Although there are different variations, the most common type of horsehair plaster is a mixture of lime, sand, plaster, and horsehair. Yeah, that’s right, horsehair. The horsehair that was used was from the mane and the tail of the horse. Horse hairs are long, strong, and when they’re mixed with plaster, they offer a lot of structural strength.
Sometimes the hair of other animals was used. Both the ox and the donkey have been contributors. Some builders have even used goat hair in their plaster walls while other’s used plant life.
Plants like hemp, straw, reed, and jute can all be used, but plant fibers are not as strong as animal hair. Why? Animal hair is protein-based, making it a whole lot tougher and more durable. So, out of all these kinds of hair and plant fibers, why was horsehair the best choice to mix in plaster?
Why horsehair plaster?
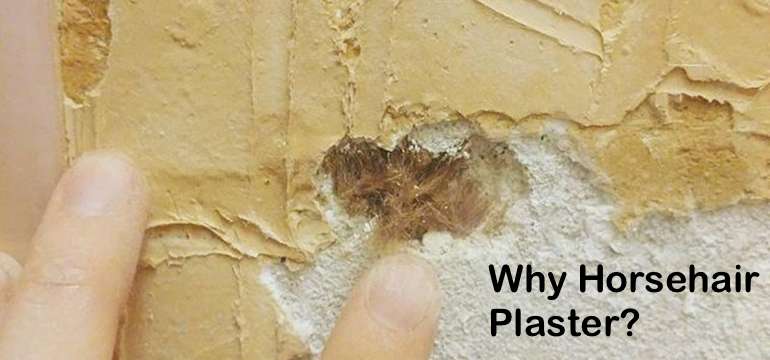
The reason why builders chose horsehair for so many years was because it’s flexible. This allows it to conform to any shape you want. In fact, horsehair is more flexible than just about any other kind of animal hair.
Once dry, plaster containing horsehair also had a more uniform look than other kinds of animal hair or plant fiber plasters. This typically worked well for homes with a lot of curvy walls.
Another reason why builders used horsehair plaster so much was that horsehair plaster could usually be purchased locally. Typically, horsehair around 16 cm in length was the longest you could buy in your community. However, builders who were interested in horsehair strands longer than 16 cm in length had to buy them overseas from countries like China and India.
How was horsehair plaster made?
When horsehair plaster was made, it was essential that the horsehair wasn’t tangling or lumpy. Lumps and tangles in the horsehair caused soft spots in the plaster.
In addition to this, it was important that the horsehair was used instantly after it was mixed and mixed right too. If the horsehair plaster wasn’t properly mixed, or it sat out too very long, the plaster wouldn’t work as well as it was supposed to.
Good reasons to restore your horsehair plastered walls
Most professionals would admit that drywall has many more advantages than horsehair plaster walls. However, there are some benefits to having these older styled walls.
☆ The look of horsehair plaster walls is very hard to be copied using drywall.
☆ Homes with horsehair plaster walls tend to be worth a lot more than homes with drywall.
☆ Horsehair plaster walls have a historical value as well. They’re a piece of history.
☆ Because of the density of horsehair plaster walls, they’re much more soundproof than drywall.
☆ Plaster is much more fire-resistant than drywall, making it a much safer choice.
☆ Horsehair plaster walls are also much more insulated than drywall. This will keep both the heat and the cool inside your home better. In return, you might even save on your monthly electricity bills.
☆ Horsehair plaster walls are much more contour than drywall. Creating curves and custom-designed arches are much more comfortable with horsehair plaster.
Repairing a horsehair plaster wall
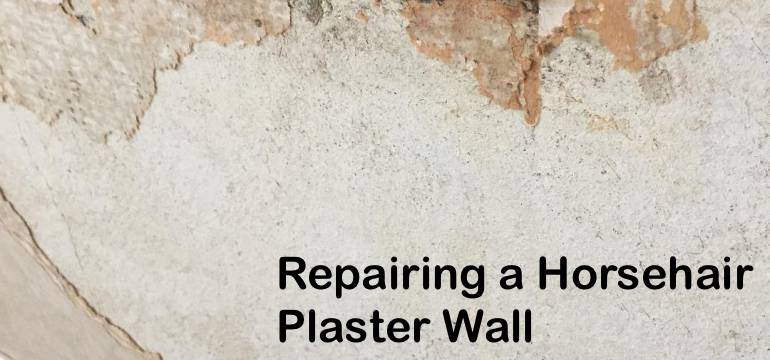
As mentioned above, horsehair plaster isn’t typically used nowadays. Drywall replaced this plaster in the 1950s. However, if you live in an older home with horsehair plaster walls and one of those walls is damaged, then repairing it can be a little confusing for homeowners with little or no home improvement skills.
So, how do your repair a horsehair plaster wall that’s crumbling or has a crack in it? To begin, you will need the following tools:
- Plaster: choose the plaster of your choice.
- A knife: this will help you remove the old, damaged plaster.
- Putty knives: these rounded knives will help you evenly spread the plaster.
- Sandpaper: sandpaper allows you to smooth out the surface and add multiple coats.
Once you’ve gathered your tools, you’re going to prepare the area. Start by marking all the areas you want to fix. This allows you to easily move between them once the plaster has been properly mixed. Most plaster needs to be used quickly after its been mixed.
With your knife, remove any crumbling or loose plaster, but make sure you’re careful. You don’t want to damage the lath below the plaster. If you find that the lath below the plaster is damaged and needs repair, you’ll have to take your knife and chisel away the plaster around the damaged portion of the lath board.
It’s important that you start repairing the damaged lath from the inside out. With the plaster around the damaged is removed, you can examine whether the wall should be replaced or re-fastened. After all the damage has been removed, the plastering process can begin.
Follow these easy steps when repairing your horsehair plaster walls.
- With a damp cloth, wipe the area down to remove any dust, dirt, or grime. Your plaster will adhere much better when the surface is clean. It’s important to note that you should never spread plaster onto a wall that’s finished or painted. If the area you’re repairing has paint or finish on it, use the sandpaper to sand it down and then wipe the surface down again.
- Remove any nails, fittings, and hooks around the area you’re going to be repairing.
- Using your putty knife, spread your mixed plaster over the damaged area. Try building up your coats. This will make the repair that much stronger.
- You’ll now want to give your new plaster wall adequate time to dry. A thin layer of plaster will dry a lot quicker than a thicker layer so that dry times will vary.
- Once the area is fully dry, take your sheet of sandpaper and sand the surface until it’s completely smooth. This will ensure your next coat will stick.
- Apply more layers as needed. You’ll want to get the thickness right, so the patch matches the rest of the wall. This may require a few layers or several layers. Just take your time, and make sure you do it right.
- After you have a flat, smooth surface, give the new plaster quite a few days to fully cure before you think about trying to finish or paint it.
Tips for horsehair plaster demolition
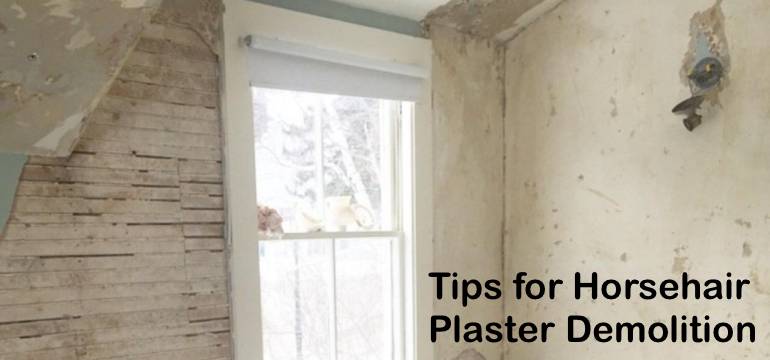
If the problem in your horsehair plaster wall is much worse than you anticipated, then you may have to remove the. If you do, utilize these useful tips:
☆ Make sure all the circuits in your home are turned off. You’ll also want to let every member of your household know you’re turning the circuits off.
☆ Use a quality voltage tester to check switches and outlets.
☆ An angle grinder works much better than a knife for removing large pieces of lath.
☆ Be sure to protect your floor with a canvas or a blanket.
☆ Before you start to remove the lath, clean up the plaster from the ground. When you have a mixed pile of lath and plaster, it’s more difficult to pick up.
☆ Lath can be easily torn off with a prybar.
Priming and painting over your newly plastered wall
Once you have given your newly plastered walls several days to cure fully, you can start the priming and painting process. However, make sure you inspect your surface for any imperfections first. If everything looks good, then you can move forward.
- Go to your local home improvement store and get pigmented shellac. This solution comes in a can, so get as much as you need to cover the wall.
- Paint the surface with the pigmented shellac using a brush with soft bristles. This solution will reduce any moisture damage caused by the patching plaster. This solution also serves as a very effective primer. That’s why you want to make sure you apply it to any area you’ll be painting.
- Apply your choice of latex paint. Apply as many coats as it takes to cover the surface fully. Darker colors will require fewer coats than lighters shades like while, baby blue, and yellow. It’s also important to note that glossier paints tend to show imperfections a lot more than non-glossy paints.
- After you have applied as many layers as needed to your wall, let the surface dry for a few days. Once dry, wipe the surface down with a soft rag. Your surface is now complete.
Horsehair plaster and asbestos
Many builders over the years have mixed in asbestos into their plaster for several reasons. Why? First, asbestos helps make your plaster stronger, more sound absorbent, and fire-resistant too. Popcorn ceilings were the most popular form of asbestos in plaster.
Popcorn plaster was popular because it was very simple to apply, it was inexpensive, and it could be applied very fast. In addition to all of this, asbestos in plaster also made the plaster cover stains and imperfections in the wall that much better. Unfortunately, it was later discovered that asbestos could cause health problems and damage to our environment.
Although asbestos can be found in horsehair plaster, most of the time horsehair plaster doesn’t contain asbestos.
In fact, many professionals say that if the plaster on your walls has a lack of dark horsehair fibers, there’s a good chance the plaster may be contaminated with asbestos. Asbestos tends to be light-colored fibers. It’s the light-colored fibers you want to look out for.
If you think your walls may be contaminated with asbestos, it’s best to have them tested. The EPA gives advice every homeowner should heed. They say that if you’re in doubt, always treat the plaster surfaces as if they are contaminated with asbestos and have them sampled and analyzed by a trained professional. It’s for your own best interest.

- Painting Over Powder Coat and What You Need to Know - February 1, 2022
- How to Get Rid of Humidity in a Basement Without a Dehumidifier - December 17, 2021
- How to Fix a Crack in Drywall That Keeps Coming Back - September 22, 2021