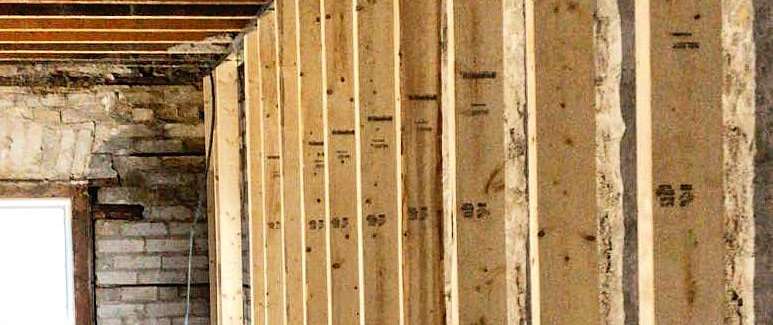
What’s a furred wall? For people who are unfamiliar with this term, a furr-out wall is when you expand the thickness of a wall using furring strips. Some people refer to this as building one wall inside of another. If you don’t know what furring strips are, they’re thin strips of either wood or metal that allow you to frame or build the inside wall.
So, why should you furr out a wall?
There are many reasons why a property owner may furr out their walls.
☆ First, furring your walls allows you to properly insulate them, and by insulating your walls, you can keep your home or business warmer in the winter and cooler in the summer. This will also help you reduce your monthly electricity bills.
☆ Second, by insulating your walls, you’ll also create a sound barrier. This is great for study rooms, offices, reading areas, and people who are light sleepers. Although it won’t make a specific room 100% soundproof, it will greatly help muffle loud noises of all kinds.
☆ Third, furring out your walls makes it easier to attach paneling, drywall, or another finish. This is especially true if you’re planning to add a built-in cabinet either to your kitchen or bathroom. A furr-out wall will give you the ability to install the cabinet securely and perfectly level.
☆ Fourth, furring out your walls gives you the ability to fix or straighten walls in your home that have uneven surfaces. You can also furr out uneven ceilings, too. Now that you know what a furr-out wall is and the reasons why people furr out walls, we can go into the steps that are necessary to furr out a wall.
However, before we start, there are a few considerations:
- After you finish furring out a wall, you will need to drywall or panel the wall. Neglecting to do this could result in the loss of heat from your home and increased electricity bills.
- If there are windows located near the furr-out area of your wall, brand new casings and interior stools will have to be installed. Why? After you furr out a wall, it’ll now be thicker and will stand out more than did the previous wall.
- Before you begin to furr out your wall, you’ll have to remove all the base paneling, as well as the trim. Once the job is complete, this paneling and trim will have to be reattached. It’s also important to note that some of this paneling and trim may not fit back because you just increased the size of the wall. This is also true for the outside corners of the room.
- After you finish furring out your walls, the room will be smaller, so you’ll have to account for that. This may include readjusting the furniture and the appliances.
- Finally, doors, light switch covers, radiators, and anything else that will get in the way will have to be removed. Once the project is complete, you can then reattach these things like they were before.
How to furr out a concrete wall
Whether you own a residential home or a commercial business, it can cost quite a lot to hire a contractor to furr out your concrete walls. That’s why if you can complete the project yourself, you can save yourself a lot of money. Although attaching furring strips to a concrete wall can be a little frustrating, if you follow the steps below, you should be able to get the job completed properly.
Before you get started, you should pretty much know what kinds of materials you’ll be using to finish the walls. If you are planning on attaching plaster, your furring strips should be spaced a little closer together. On the other hand, if you’re planning to finish the wall with heavy wood planks, then you’ll want to space out your furring strips a little more. It’s also important to note that attaching the furring strips vertically makes putting up the finish a much easier job.
If you do not know how to properly space out your furring strips, follow the directions below. These directions are for concrete walls that will have a drywall finish attached to it. As mentioned above, if your finish will be a material that’s heavier like wood planks, simply space out your furring strips out a little more.
- Equip yourself with a tape measure and spread it cross the bottom of the wall your about to furr out. With a pencil or a marker, mark a dot every 16 inches.
- Now, repeat this process at the top of the wall. These markings will indicate where you will vertically attach your furring strips.
- With a pencil or a marker, draw vertical lines from the bottom dots to the top dots. Do this for every set of dots. These lines will ensure that you lay your furring strips in the right locations.
Once you have successfully made your markings in the right areas, you can now attach the anchors. However, you’ll need to choose the proper anchors for your project. Although there’s several different kinds from which to pick, the two most popular are the sleeve anchor and Tapcon Concrete Screws. Sleeve anchors are a great choice for both brick and block walls and feature a flat, countersunk head. Tapcon Concrete Screws are also a great choice and used by contractors all over. These screws can both be put into brick and block walls and will hold up your furring strips securely. Each of these products is a great choice and offers strong and reliable anchoring. The choice is yours.
The first part of furring out a wall is to install the anchors into the concrete. The simple steps listed below are easy to follow and can be done fairly quickly. To start:
- Take your furring strips, evenly line them up, and position them how you want. Once positioned, take a pencil or a marker and mark where you’ll drill the holes directly on the concrete.
- You’ll now want to get a carbide-tipped masonry bit and attach it to your hammer drill. Make sure the holes you are about to drill are about the exact size as the sleeve anchor. It’s important that when you drill the holes, you stagger and space them about 8 to 10 inches apart.
- If there is any debris stuck in the holes, use an air compressor to clean it out. You can also use a shop vacuum or some sort of a brush. Wire brushes work the best.
- Take your sleeve anchors and carefully insert them into the holes. They should fit snugly and be positioned correctly.
- Once you have inserted the sleeve anchors, position your furring strips in the correct locations and then with a driver, tighten the screws.
- Repeat this process for the whole wall.
After you have inserted all your sleeve anchors and attached all your furring strips, you can then begin to attach your drywall or your wood paneling.
How to furr out a wall with wood studs
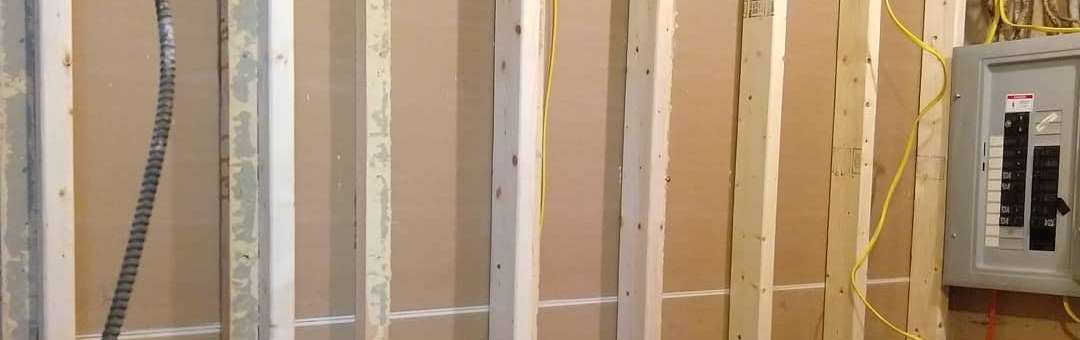
When furring out a wall with wood studs, you’ll want to space out your furring strips about the same way you’ll do with concrete or brick, but you’ll need to make sure the vertical lines that you draw are directly over the studs. For some homes, this is 16 inches apart. However, if it’s not, you have to accommodate. If you can’t seem to find the studs, you can go to any hardware or home improvement store and get a stud finder. These are very useful tools.
Once you have found your studs and drawn your vertical lines up and down the walls, drill the holes and insert the anchors just like you did above. Make sure your anchors are spaced about 8 to 10 inches apart. After the anchors have been inserted, attach your furring strips and then your drywall. Some people apply a coating of adhesive to one side of their wood furring strips before attaching them and attaching the screws or pounding in the nails. Adhesive helps support the furring strips that hold the drywall or the wood paneling.
If you follow these simple but easy tips, you should have a flush-looking wall once you are complete. By doing the job yourself, you’ll keep more cash in your wallet instead of paying big bucks to have someone else complete the job.

- Painting Over Powder Coat and What You Need to Know - February 1, 2022
- How to Get Rid of Humidity in a Basement Without a Dehumidifier - December 17, 2021
- How to Fix a Crack in Drywall That Keeps Coming Back - September 22, 2021