If you’re unfamiliar with a furring strip, it’s best described as a long, slender strip that’s constructed from either wood or metal. In most cases, furring strips are 1” x 2” or 1” x 3” in size and can be applied either horizontally or vertically. Metal furring strips come in two different styles:
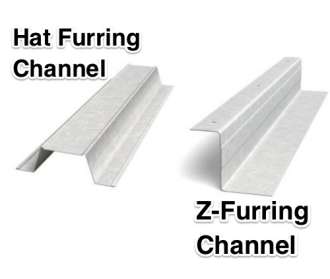
- Hat channel shaped: These furring strips got their name due to the fact that they’re shaped like a hat. Hat channel furring strips are the most common kind of metal furring strips and are mainly used in the real estate industry due to its heat-resistance qualities.
- Z-channel shaped: These furring channels are also a very popular choice and are commonly used in residential home improvement projects due to its versatility and the number of fastening methods it supports.
So, for what are furring strips used? Furring strips have several uses. First, these wood or metal strips help carpenters create a level, solid frame that allows them to effectively attach wood, paneling, or plaster to a wall or a ceiling. Second, furring strips are used to create air space between the plaster and the wall itself.
Third, furring strips are a useful tool when installing insulation into your walls; and, last but not least, furring strips are frequently used in tub and shower installations.
Furring strips used for supportive structure
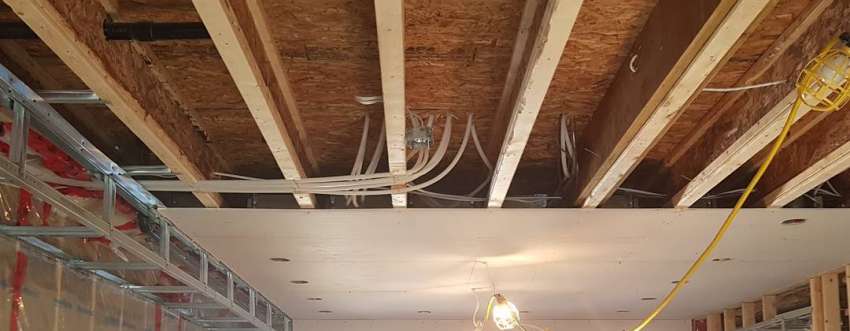
Furring strips are used to provide carpenters a level and supportive structure when they’re applying the finish. Whether it’s the ceiling or the walls, furring strips are essential to ensuring that you’ll always get a flat and smooth surface when the project is complete. When applying furring strips to your walls, they will have to be directly screwed or nailed into the wood or concrete wall. From there, you’ll simply add the next layer.
Furring strips used to create space
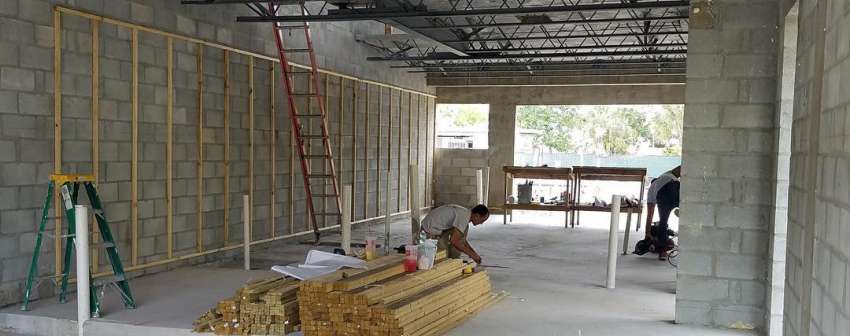
If you’re involved in a drywall project, it’s important to remember that you must provide an air space between the wall and the finish. Furring strips create the necessary space between the two layers. If you’re using furring strips when completing a drywall project, you have to nail them in before you cover them with wood panels or a drywall finish.
Furring strips used for insulation installation
Installing insulation on the inside of a wall usually calls for the use of furring strips. Generally, these strips are applied directly to the walls with concrete screws. The insulation is then inserted between the wall and the furring strips for a perfect fit. Once the insulation is inserted, many carpenters use gypsum board to cover the insulation. They simply nail it into the wall and the furring strips.
When using furring strips for insulation projects, carpenters tend to choose flat furring strips. These specialized strips are made to help prevent a thermal short. Whether you use flat or normal furring strips, one thing is for sure, these amazing strips will prevent moisture from getting inside the wall. Why is this important? When moisture gets inside of the walls, it can start to grow mold. Once mold gets out of control, it’s not only bad for your health, it’s also quite expensive to hire professionals to eliminate the mold.
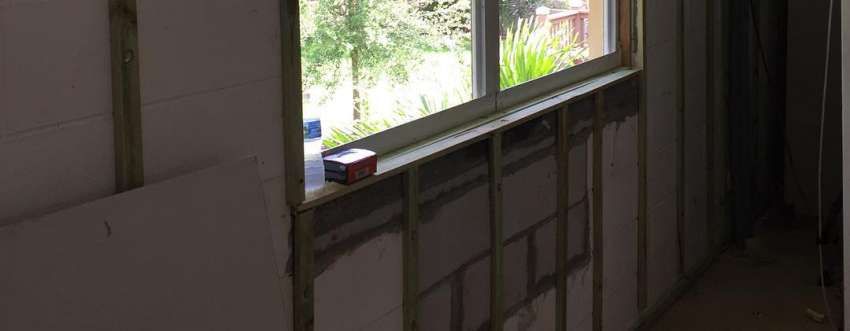
Furring strips used around showers and tubs

Finally, furring strips are also commonly used in both showers and tubs, which usually have an underlining pan. Furring strips help level the surface underneath the backer board when the studs that you’ve inserted cause an uneven surface. Once the surface is level, you can then lay down the backer board and put the remainder of the shower appliance together.
In addition to this, bathrooms that are going to be tiled should also have furring strips installed on the surrounding walls to prevent the backer board from sticking out from the bottom. If the base of your tub is surrounded by plastic, you shouldn’t need to apply furring strips. However, if the wall around the tub is going to be tiled, then furring strips are a good choice.
Now that you understand all the uses that furring strips have to offer, it’s also important to fully understand how to properly attach them. It’s important you get it right, because failure to do so could result in an uneven shaped surface, among other problems.
Attaching furring strips over both insulation and concrete
When insulating a wall, it’s always best to go with rigid foam. Why? Rigid foam does not absorb moisture, even in the smallest bit. As a result, you will not need to utilize any sort of vapor barrier whatsoever. However, if you’ve decided to use drywall as a finisher once the wall has been insulated, then your furring strips should be attached every 16 inches from the top to the bottom. By doing this, you’ll provide the drywall something to which it can attach. Follow the steps listed below to attach your furring strips properly.
- Take a 2-by-4 piece of wood that has been pressure treated and lay it on the floor. You’ll want to slide the 2-by-4 into the corner where both the floor and the foam meet. There should be no gaps between the board and the rigid foam.
- Now you’ll want to turn the 2-by-4 board over and spread a powerful adhesive from one end of the board to the other. The adhesive you choose should be designed for construction projects. Once you have spread the adhesive, turn the board over and press it down really hard into the corner of the room, where you had it before you originally flipped it. Now do the same with another 2-by-4 board and once the adhesive has been spread, place it next to the first 2-by-4. These two boards should be stuck end to end. You’ll want to do for the entire length of the room.
- Using power drill, carefully drill angled holes first through the top of the board and then into the concrete wall. You’ll need a hammer drill with an 1/8-inch masonry bit. The holes in the boards should be spaced about 16 inches apart and be driven into the concrete by 1½ inches.
- Take 3-inch fluted nails and drive them into each of the pilot holes and into the concrete. You’ll need to use a 3-pound sledge hammer to get this done.
- Using a tape measure, measure the distance from one of the 2-by-4 boards that you laid down. Once you know the length, write it down, and cut two furring strips this exact length.
- Coat one side of the furring strip with a tough adhesive. Do this for the full length of the strip, and then press the furring strip onto the foam insulation. This should be located in the room’s left corner.
- Drill 1/8-inch pilot holes through the furring strip that you just laid onto the foam. You’ll also want to drill 1/8-inch holes into the insulation and 1½-inch holes into the concrete wall. All of the holes should also be spaced at least 16 inches apart.
- Hammer the 3-inch fluted nails into each of the pilot holes.
- Take the second furring strip and spread adhesive one one side and press it against the insulation as with the first furring strip. Continue applying furring strips all the way down the wall until you get to the right side.
Installing tub furring strips
Like mentioned above, furring strips help keep the backer board from flaring out in bathrooms with tiled walls. To apply bathroom furring strips, you’ll want to:
- Start by examining the base surround the tub. If you see any nails, screws, or filth, remove them and clean up the area. You’ll also want to examine the tub flange to see if the tub is sitting evenly.
- With a tape measure, record the length of the tub’s flange. It’s important to note that the thickness of your furring strips should be no thinner than the thickness of the tub flange.
- With a tape measure, you’ll now want to measure the height from the tub flange to the ceiling. Write down this length and cut the length of the furring strips to this exact measurement. Make sure you cut enough furring strips to cover each one of the studs.
- With a caulking gun, spread adhesive on top of every stud touching the tub flange. Now attach the furring strips with finish nails to the studs.
- Continue this process for the other studs on the other walls with furring strips. Once you complete the job, you’ll really notice how much better your bathroom looks.

- Painting Over Powder Coat and What You Need to Know - February 1, 2022
- How to Get Rid of Humidity in a Basement Without a Dehumidifier - December 17, 2021
- How to Fix a Crack in Drywall That Keeps Coming Back - September 22, 2021