Are you sick of your toilet rocking every time you use it? If your toilet is loose but is not leaking, you can read on to learn how to shim a toilet. Usually, the cause of a wobbly toilet is that it is not sitting flush against the floor.
If the toilet flange, the round item that sits under the toilet and connects the toilet to the drain pipe, is higher than the floor, the toilet becomes raised. The raising of the toilet causes it to rock from side to side.
Even though the installed toilet might be perfectly level when it is first installed, it may become unlevel over time. Once the caulk hardens or when the floor settles the toilet can begin to rock.
Regardless, this article will teach you how to shim a toilet on an uneven floor and how to cut plastic toilet shims as well as how to take care of any rocking toilet. Just follow the easy steps below, and you should get your toilet even in no time.
Step 1: Tighten the Bolts
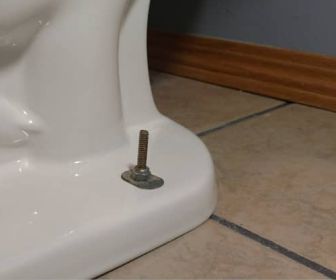
Sometimes a wobbly toilet can be repaired immediately by tightening the two flange bolts that are located at the base of the toilet. Use caution when turning these bolts. Over tightening flange or closet bolts will crack the porcelain and there is no repair for this critical mistake.
The easiest way to achieve this step is to check each bolt using a pair of pliers or a small wrench. They are located on either side of the toilet. If one of the bolts are loose, tighten it very slowly until it is just snug. Check the other side and make sure the flange is equally as snug and test the toilet. If it still rocks you will have to shim the base of the toilet.
Step 2: Collect Your Supplies
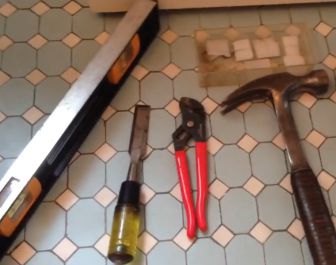
You are going to need small plastic shims with ridges. These kinds of shims stay in place better and are usually sold at hardware stores. Do not buy wooden shims. They will compress over time and are notoriously vulnerable to moisture damage.
Besides the shims, you will also need a utility knife, a rag or paper towels, and tub and tile caulk that is the same color as your toilet and floor.
Step 3: Do a Leak Check
If the base of the toilet is not dry, you may have a leak. Check for water around the base of the toilet. If it is dry, there is no leak, and you can start your repair. If there is water around the base, it may mean that the wax ring around the toilet may be old and flattened. If this is the toilet has to be removed, and the ring has to be replaced.
Step 4: Search for the Gaps
Check the base of the toilet and find where shims may be needed. You will identify these spots by seeing gaps between the toilet and the floor. If you rock the toilet from side to side, the gaps will be easy to see. If you are having trouble seeing smaller holes, try sliding the shim under the toilet and check how far the shim goes under the base.
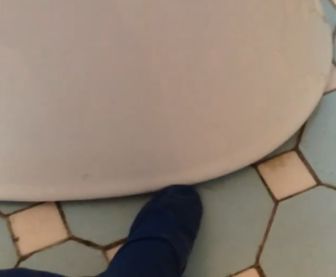
Step 5: Place the Shims
![]()
![]()
It is now time to level the toilet. You can steady the toilet by inserting the shims into the gaps that you have found. It may take a few tries to get the toilet leveled, but you can try different shims in different places. Try sitting on the seat and rocking it from side to side to see if the toilet is level. Keep repeating these steps until the toilet is stable.
Step 6: Cut Plastic Toilet Shims
![]()
![]()
You will now need to cut the plastic toilet shims, so they are flush with the base. Use a utility knife to trim as close as you can. Use caution as you do not want to cut into the flooring.
Step 7: Caulk Around Your Toilet Base
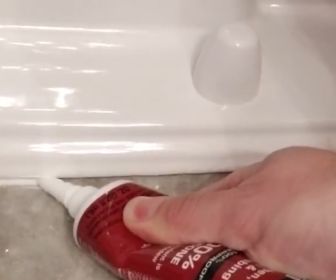
Once the shims are cut, you can now begin caulking the toilet. Apply a thin, even layer of caulk around the base of the toilet, making sure you cover the gap between the floor and the toilet. You also want to make sure that you hide the shims. Smooth the caulk with your finger and use a paper towel or a rag to wipe your finger clean frequently.
Caulking the base of toilets is a standard practice and is beneficial. It extends the service life of the installed floor gasket.
One thing you should be careful though: Just never run the caulk around the entire perimeter of the base. Leave a gap in the caulk ( I prefer grouting after shimming) at the back of the base so that leaks can be detected. If you caulk all the way around, then leaking water will collect under the base of the toilet until you have a bigger problem.
Step 8: Leave It Alone
Do not allow anyone to use the toilet until the caulk has cured based on the directions on the bottle. Once it dries your toilet should be as good as new.
Allow the caulk to dry as directed before using the toilet. Once it dries thoroughly, your toilet should be as good as new.
Step 9: Check Your Work
If the caulking cures and the flange bolts are tight and the shims are in, but the toilet is still rocking there may be a more severe problem with your toilet. The closet bolts are held by a metal or plastic ring that is located at the top of the flange. If the ring is corroded or broken, its grip on the bolts is loosened.
If it seems like it is fixed at first, but the rocking resumes later or if the bolts loosen again it could be a damaged flange. You would have to remove the toilet and replace the old flange bolts or buy a flange repair kit.
We hope that this article has helped you understand how to shim a toilet on an uneven floor and floor when you need to use plastic shims. As always, if you cannot figure out how to do it yourself or if you want to save time, we suggest hiring a professional plumber to help you get the job done.

- Is a Hot Water Heater In the Attic a Good or Bad Idea? - July 18, 2021
- Lawn Mower Starts Then Dies – Here’s the Fix! - June 21, 2021
- Can You Mix Pine-Sol and Bleach? - September 9, 2020