Shiplap is a rustic yet chic style of interior finish that was primarily popularized within the past decade by the TV show “Fixer Upper,” hosted by renovation and decor experts Chip and Joanna Gaines.
The pair’s quirky chemistry and their ability to transform dysfunctional homes into modern showpieces heightened the show’s popularity. Before long, homeowners were itching to try their own DIY renovations, including one of Joanna Gaines favorite wall materials—shiplap.
Find out more about this style choice, including the true definition of shiplap and the possibility of installing shiplap over drywall.
What is shiplap?
Purists in the field of home renovation sometimes take issue with the styling of the wood that Joanna calls “shiplap.” Genuine shiplap consists of horizontal boards with notches known as rabbets along the edges.
These notches lock the boards together, ensuring a watertight seal. Traditionally, shiplap was a form of exterior siding.
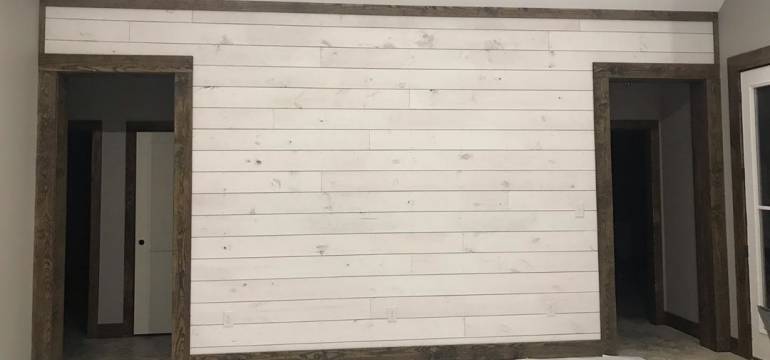
Though these notched siding pieces are the truest form of shiplap, most DIY home renovators understand shiplap to be tongue-in-groove boards with lapped joints that fit together neatly, or simply a series of basic boards nailed to the wall, covering its entire surface.
Usually, these boards are painted white. Their color and their horizontal position can make a room feel bigger. If you install shiplap on the ceiling, it pulls the observer’s gaze upward, giving the illusion that the room is higher or taller than it actually is.
Can you install shiplap over drywall?
Maybe you’ve got your heart set on installing shiplap in your home, but you’re not so sure about ripping out whole chunks of the drywall that’s already there. Good news—you don’t have to!
You can install shiplap right over the drywall. However—and this part is crucial—you must first take the time to find all the studs within your walls and mark them carefully before you place a single board.
Finding the studs before installing shiplap
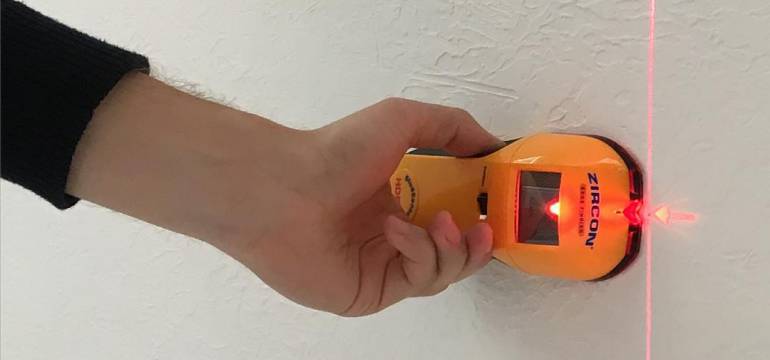
In order to locate the studs underneath your existing drywall, invest in a stud finder if you don’t already own one, or borrow a friend’s stud finder. Turn on the device and hold it flush to the wall. Depending on the model you’re using, the finder will beep, light up, or otherwise indicate when it’s passing over a stud within the wall.
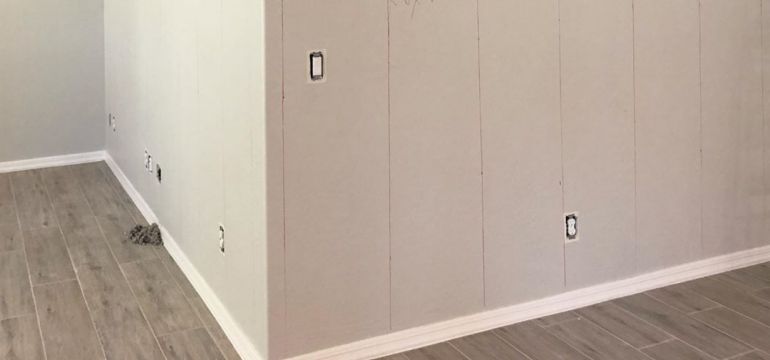
With chalk or a pencil, mark each spot where there is a stud.
There are also methods for locating studs without a stud finder. You can find them in this article.
Why is it so important to find the studs before installing shiplap over drywall? Without knowing where the studs are, you won’t know where to anchor your shiplap boards securely. If you only nail them to the papery drywall, they could rip right out, causing significant damage. You want each piece of shiplap to be firmly anchored to at least one wall stud, preferably two.
If your drywall is already finished and painted, so much the better! If not, tape and mud the drywall seams before installing the shiplap. Taping and mudding offer extra protection against insects, pests, odors, or drafts that might seep through the wall.
How to install shiplap over drywall
Once you’ve found and marked the studs, begin sticking the pieces of shiplap in place using a heavy-duty adhesive. This gives you a tougher, more durable hold for your shiplap walls over drywall, and it also allows you to get a sense of board placement before you start nailing everything to the studs permanently.
Start at the bottom of the wall and work up. Use a level to ensure that every board you place is perfectly situated, so you have a neat, crisp finished wall that doesn’t look wonky or slanted.
To gain that little bit of separation between each board for the ultimate shiplap look, use a uniform measure to keep the boards an even distance apart. Many people use a coin in between the placed boards, to ensure a uniform amount of separation. The grooves between each row of horizontal boards should all be exactly the width of a coin.
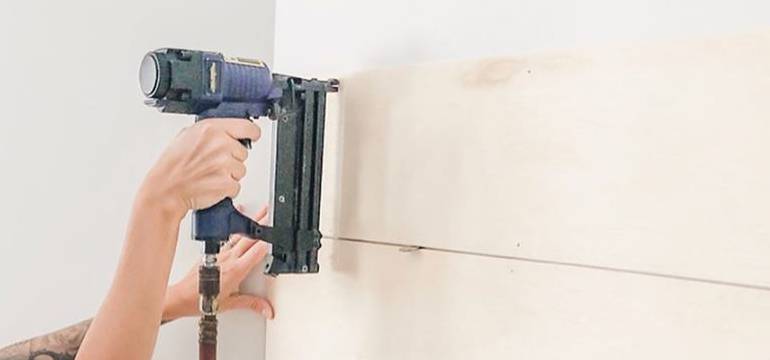
In addition to your adhesive, use nails and a nail gun to attach each newly placed board to the studs that you marked during the earlier phase of preparation.

Keep in mind that you shouldn’t nail them before cutting the holes for the outlets.
Benefits of installing shiplap over drywall vs. studs
Though installing shiplap walls over drywall is possible, it’s definitely easier to install the boards directly onto your studs, with no drywall involved. Each stud is easy to see, and you don’t have to go through the process of finding and marking them all.
Installing shiplap over drywall has one significant benefit—you have a continuous barrier behind the boards. This can help prevent air leakage, making your home more airtight and therefore more energy efficient. You’ll lose less cold air during the summer when you’re running the AC, and less warm air during the winter when you’re running the heat—so you may notice some savings on your electric or gas bills.
Whether you’re installing shiplap over drywall or onto the studs, take your time with each step, including the final sanding, priming, and painting of the boards. Once it’s all done, you’ll have a beautiful, sleek, modern-looking room that you can style to suit your personal preference.

- How to Cut Lexan - September 25, 2020
- Mineral Spirits vs. Mineral Oil - September 25, 2020
- Shellac vs. Polyurethane - September 24, 2020