When it comes to shower P-traps, a lot of homeowners don’t even know what they’re for, if their shower drains are built with them, and how to replace them. If you’re unfamiliar with the P-trap, then read on. You’ll be glad you did. Not only will you have a higher respect your home’s plumbing system, you’ll be able to repair it when it’s not working properly.
Do shower drains have traps? If so, what’s their purpose, and how do they work?
 According to regulations, all shower drains are required to have P-traps. This includes all fixtures connected to a building’s main plumbing system. P-traps are curved pipes installed under showers and drains of all kinds. The P-trap not only directs your waste water out of your home, this essential pipe also keeps small organisms and sewer fumes from entering your living space by providing a powerful barrier. This pipe really is an essential component in your home’s plumbing system.
The P-trap is composed of three main parts. They include the inlet, the downward bent, and the outlet. The inlet is where your waste water enters. The downward bend portion of the pipe fills up with water and produces an airtight seal keeping sewage fumes and small organisms from entering your home. Lastly, the outlet is where the waste water leaves the pipe and heads to your public sewer plant.
Where should shower P-trap be located?
First, your P-trap should be located directly below the center of your shower and close to your shower drain. Homeowners who install their P-traps too far away from the drain may experience more odors than what’s normal. Just remember, the longer the distance from the shower drain to the P-trap, the more your drains will stink your bathroom up.
Properly cleaning your shower P-trap
Cleaning your P-trap on a regular basis will not only help decrease unwanted odors, it’ll also help keep your P-trap from getting clogged and needing to be replaced. Cleaning your shower P-trap is not as easy as cleaning the P-trap under your sink, because it’s not accessible unless you’re renovating your bathroom. However, if you have a plumber’s snake, you may try running it down the drain to clean it out. Here is a video on how to snake a clogged drain.
Otherwise, start by removing your shower drain cover and using a bristled brush, vinegar, and warm water. In addition to this, you can also pour a safe yet effective drain cleaner down your drain from time to time. Effective drain cleaners will keep your P-trap clean, but they could damage your pipes if you use these products too often.
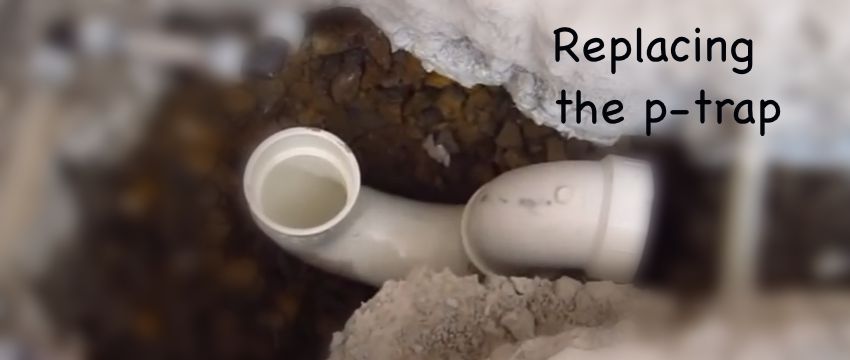
Replacing the shower P-trap
Now that you know what a P-trap is and what it’s used for, it’s important to discuss some of the problems you might have with this curved pipe. One of the main issues homeowners face when it comes to the P-trap is crud and grime building up in the corners of the pipe overtime. As a result, the P-trap will need to be replaced. So, how do you replace this?
Replacing the P-trap on a shower is a little more difficult than replacing it on a sink. This is because the P-trap under a shower isn’t accessible. The best time to replace your P-trap is when you’re renovating your bathroom.
- To begin, start by cutting the subfloor around the drain with an electric saw. Make sure you cut an even 12” by 12” square piece, and that you only cut the portion that runs over the floor boards. By doing this, you’ll ensure that you’ll have something to nail the subfloor back into once you’re finished.
- After you have made your cuts, use a prybar to work the square out. Be careful when you’re doing this. You want to make sure all your edges are flush, so the subfloor fits nicely back in once the job is complete. Once the square piece has been removed, cut the drain off with a saw right after the P-trap. You can throw this piece away.
- When attaching your new P-trap to the end of the pipe, you may need to use a reducer if the pipe coming up from your shower floor is a different dimension than your new P-trap and your drain. The reducer allows you to transition from one size to another. When attaching the reducer and the P-trap, spread a high-quality glue on the inside of them, and then attach them firmly. Make sure you get the P-trap in the right location.
- Reattach the square subfloor piece and then measure the distance the from the P-trap to the subfloor. You’ll now want to cut a piece of ABS piping to that exact measurement and attach it to the end of the P-trap. Again, make sure you use plenty of glue and attach it firmly. Once all the piping is connected, you can then reattach your shower drain. It’s that easy.

- Painting Over Powder Coat and What You Need to Know - February 1, 2022
- How to Get Rid of Humidity in a Basement Without a Dehumidifier - December 17, 2021
- How to Fix a Crack in Drywall That Keeps Coming Back - September 22, 2021