Baseboards are an important part of a room’s finish. Without the baseboards, the room looks incomplete, unprofessional, and awkward at best. It’s important to take your time and be careful while installing or replacing baseboards, so you can ensure that the room you are finishing is completed to the highest possible quality.
To that end, you’ll need to know a few key points about baseboard installation. If you’re asking yourself, “What size nails work for baseboards?” we’ve got the answers right here, along with a few extra helpful tips for baseboard installation.
Dangers of Underestimating or Overestimating Nail Size
If you use nails that are too long, you run the risk of accidentally piercing through the baseboard and drywall into some wires or pipes. Use your common sense when selecting the nails, and you’ll avoid majorly overdoing it in the nail size department.
On the other hand, if you use nails that are too short, they won’t bite deep enough into the drywall or studs to which you are nailing the baseboards. In that scenario, the baseboards wouldn’t be secure enough. They might stay in place for a while, but with regular wear and tear and the natural shifting and flexing of the walls, they would slowly work free. You would begin to notice cracks along the baseboards as they detached themselves from the wall. So it’s best, before you begin the project, to be absolutely sure you’re using the right nail size for baseboards in your home.
As a general rule, baseboard nails shouldn’t be any longer than 2 inches. The ideal length is between 1.5 inches and 2 inches.
Finish Nailers and Pneumatic Nail Guns for Baseboards
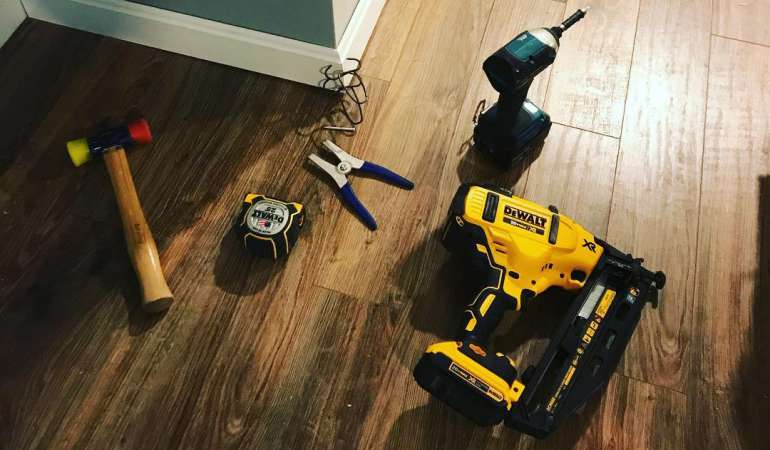
For attaching the baseboards, you’re probably going to be using a nail gun of some type, so let’s talk about trim nailer guns for a second. A trim nailer gun, also known by other names, including the term “pneumatic trim gun,” is designed to save workers tons of time by forcefully injecting the nails into the material being fastened, which in this case would be the baseboards.
Thanks to their precise, powerful action, these pneumatic trim guns enable you to hold the baseboard or piece of trim in position while still achieving the exact placement you need for the nail. Plus, the speed is definitely a major benefit, enabling you to accomplish a lot more work within a small amount of time.
In general, construction experts suggest following this guideline: the larger the gauge number of the trim nailer gun, the smaller the nail you’ll need for it. So since you’re looking for an aesthetically pleasing finer finish for the baseboards in your home or building, you’ll probably select a finish nailer that’s between 15 gauge and 16 gauge. This type of gun will take the kind of small, unobtrusive nails that you want inserted into your baseboards.
What Size Nails Do I Need for Baseboard Trim?
Let’s talk about how to use the nail gun size to determine the best size for baseboard nails in your home. As previously mentioned, a higher gauge number indicates a thinner nail. So the larger the gauge number is, the slimmer or finer the nail will be. Standard finish nailers use nails with a gauge of 15 or 16, but for more delicate moldings, you might end up using nailers that are 18 gauge to 23 gauge with even slimmer, shorter nails.
To make it easier, think of it this way.
- Finish nailers: 15 gauge and 16 gauge nailers
- Brad nailers: 18 gauge nailers
- Pinner or micro pinners: 23 gauge nailers
Now let’s break it down a little further.
15 Gauge Finish Nailer
For baseboards and other trim pieces that are about 3/4 of an inch thick, you’d probably want the 15 gauge finish nailer. Due to its power and size, this nailer can also handle tougher jobs like nailing stair treads in place or attaching doorjambs. The large piston within the nailer allows for extra power.
Some types of 15 gauge finish nailer come with the option of an angled magazine, which permits better access around corners and in tighter spots. A good-quality 15 gauge finish nailer is fairly affordable and can inject nails, which are up to 2.5 inches long. You’ll want to use compatible nails of up to 2 inches in length for a standard baseboard.
16 Gauge Finish Nailer
The 16 gauge finish nailer really isn’t that much different than its 15 gauge counterpart. Like the other type, it handles nails up to 2.5 inches in length, although you won’t need more than 2-inch nails for the baseboard project. A 16 gauge finish nailer can shoot nails into fairly thick pieces of trim.
However, it takes slightly thinner nails, and it’s a bit smaller and less heavy, which makes it easier to wield. Regarding the price, it costs about the same as a 15 gauge nailer.
18 Gauge Brad Nailer
The 18 gauge brad nailer is probably the most handy and versatile of all the nailers. The nails it can handle are shorter, about 1 1/4 inches long, though you can spend a little extra and get one with a maximum nail length of 2 inches. This type of nailer is cheaper than its 15 and 16 gauge counterparts.
Whether you’re attaching trim, making furniture, or doing various small projects, this nailer is up to the task. As an all-around nail gun, it can’t be beat, although for the specific task of affixing baseboards, a 15 gauge or 16 gauge finish nailer might be a better choice. So if you plan to do a lot of baseboards with the nailer you’re borrowing or buying, go for the 15 or 16 gauge.
23 Gauge Pinner
In most cases, you wouldn’t use a 23 gauge pinner for baseboards. The nails it can handle are simply too short and thin to do the job. This type of nailer works best for attaching little parts for a small wood project.
If you’re in doubt about which size nailer to use, you can always ask a friend or acquaintance who has experience with placing and fastening baseboards or other types of finishing trim.
Why Are Baseboard Nails So Thin?
You may wonder why baseboard nails are designed to be so narrow in diameter. Typically, these ultra-thin nails are used because of their small footprint. In other words, they make the smallest possible holes in the trim. Baseboards are trim pieces whose primary purpose is aesthetic. They are there to make a room look more complete, with smoother, more pleasing edges. So it makes sense to mar these pieces as little possible.
With the slimmer nails and smaller nail heads, it’s much easier to cover up any sign of the finish nailing process. The best nails for baseboard trim are those that can be easily covered with a bit of wood filler and painted over so that the baseboards yield a smooth, unblemished look. That way, the finishes in the room maintain the polish that’s expected of a professionally done home interior.
How To Nail a Baseboard?
Once you have your finish nailer and you’ve stocked up on the type of nails it takes, it’s time to attach the baseboard.
- Set the baseboard along the wall, cutting it if needed to fit the exact length that you need for that particular stretch of wall. You’ll also need to create mitered edges at the ends of the baseboard pieces if they’re not already in place. These edges permit pieces of baseboard to fit together perfectly at an interior or exterior corner.
- Once you have the right length and the right edges, jam one end of the baseboard right into the interior corner of the wall and make sure it lies flush against the corner and along the floor. Begin by putting one nail at each end of the piece of baseboard you’re attaching, just to maintain its position and keep it in place.
- After you’ve inserted the first nail, press hard against the baseboard to make sure it is tight against the wall and lined up perfectly straight with the floor, then shoot in the second one at the far end.
- Following that first set of placeholder nails, add more nails to ensure that the baseboard stays flush with the wall. Insert vertical pairs of nails, one toward the top edge of the baseboard and the other toward the bottom edge. Some experts suggest shooting the pairs of nails every 16 inches, while others prefer intervals of 14 inches or even 12 inches.
- Another thing to remember is to try to get some of the baseboard nails all the way through the baseboard into studs, not just into drywall. To simplify this part of the process, pick up a stud finder and skim it over the wall you’re trimming. The stud finder will beep when it locates the studs under the drywall. When you find a stud, make a tiny, light X with a pencil, right above where you’ve pinned the baseboard with those first two nails. This way, you’ll be able to see where the studs are as you’re inserting the rest of the nails, and you can prioritize the placement of nails in those spots.
- Inject the nails through the baseboard directly underneath those penciled X marks. Later, you can erase or paint over the X marks. Always be sure to inject nails straight into the baseboard and the wall, not at an angle. In addition, finish off the baseboard with a smooth, professional line of white caulk along the top.
The result will be a crisp finish for the room that you’ve worked so hard to prepare!

- How to Cut Lexan - September 25, 2020
- Mineral Spirits vs. Mineral Oil - September 25, 2020
- Shellac vs. Polyurethane - September 24, 2020