When caulking your shower surround or your shower stall, it’s important to remember that choosing the right caulk is just as important as doing the job correctly. A good caulk for your shower or tub should be durable, easy to apply, offer protection against mildew and other bacteria, and hold up to high temperatures.
There are a lot of different kinds of caulk on the market and knowing which to use can be a little difficult. However, the most popular choices include:
Acrylic latex, PVA, and 100% silicone are usually recommended by most professionals over siliconized acrylic latex. That’s not to say siliconized acrylic latex isn’t useful. It’s just not as effective as the other three.
Acrylic Latex
Acrylic latex is a very common caulk used in home improvement projects. Why? Acrylic latex is easy to apply. It dries faster than silicone, and it’s easy to clean up when it’s still wet. When you properly apply acrylic latex, it creates a really tough seal that’s resistant to mildew. In fact, out of all the caulks, it’s the most resistant to mildew.
As far as the downfalls, acrylic latex doesn’t work as well when in contact with water as silicone does. If you’re looking for the best caulk for your shower, silicone is the better choice. That’s not to say acrylic latex can’t be used in the shower, but it just doesn’t stand up to water as well as 100% silicone.
Although there are several brands of acrylic latex sold in home improvement stores, one of the best you can purchase includes a product called DAP. This white colored acrylic latex is mildew resistant, is paintable, exceeds ASTM Spec C-834-91, and even comes with a 35-year guarantee. The best part? It’s also extremely affordable too.
PVA (polyvinyl acetate)
PVA (polyvinyl acetate) is another caulk that’s very similar to acrylic latex, but it’s made from polyvinyl, not latex. PVA is mildew resistant, durable, easy to apply, and is heat resistant too. Just like acrylic latex, PVA is also paintable.
Now for the downsides. PVA can deteriorate over time and is not as resistant to water as silicone caulk.
If you’re interested in using PVA for your shower caulking project, you’ll want to use a high-quality product. One of the best PVA products out there is Polyseamseal. Polyseamseal can be painted over in as little time as 40 minutes after you apply it and can be used on all kinds of materials like wood, ceramic tile, moldings, wood, brink, metal, and even concrete.
100% silicone
Silicone caulk is commonly known as the rubberized caulking, because the seal will be flexible and have a rubber feel throughout its life. As a result, silicone caulk can handle movements in the joints, the areas where the walls meet. Acrylic latex can crack under the same conditions.
In addition to this, silicone caulking will hold up to water better than acrylic latex. This trait makes it the better choice for showers and other damp areas. Silicone caulk is also more resistant to both the heat and the cold, and it’s available in a wide array of colors.
Even though silicone caulk is a great product, it has its downfalls too. For instance, paint has a real hard time sticking to it. This is where acrylic latex wins the race. Another downside to silicone caulk is that you can’t apply another layer of silicone once the bottom layer has fully dried. With acrylic latex, you can.
Lastly, once you apply your silicone caulk and it becomes fully cured, the caulk will be extremely tough to remove. Someday, down the road, you may want to re-caulk your shower, and when that time comes, removing the old caulk will be a challenge. Not only will the old caulk be tough to remove, leftover caulk residue that hasn’t been removed can jeopardize the new caulk.
In fact, the areas where caulk residue was left will be more vulnerable to leakage. Many people find this to be the biggest downfall to silicone caulk.

![]()
One of the best silicone caulks you can buy today is a product called Laticrete. Laticrete is easy to apply, comes in a wide array of colors, and is resistant to water, mildew, mold, and high temperatures. Once you apply it, it’ll last for several years to come.
Siliconized acrylic latex
Siliconized acrylic latex is considered a hybrid caulk, because although it has some of the qualities of acrylic latex caulk, it’s also kind of flexible too, just not as flexible as 100% silicone caulk. However, siliconized acrylic latex has shown not to be that effective and isn’t the most popular choice amongst professionals. You can go ahead and use it if you want, but don’t expect fantastic results.
Choosing the best caulk for your shower
Now that you have a good understanding of the different kinds of caulk, it’s time to choose the best kind for your project’s needs. Take advantage of these easy tips when choosing:
If you’re caulking a tile shower wall or a ceramic tub, you’ll want to make sure you use a caulk with mildew resistant qualities. In reality, you should always try and use a mold resistant caulk, but for tile and ceramic tile walls, it’s especially important. Why? Mold tends to grow more on these kinds of surfaces.
If you’re your bathroom features a fiberglass tub, shower surround, or shower stall, then silicone caulk is the best choice. This is because silicone caulk is a softer kind of caulk and will be kinder to your fiberglass surfaces.
Lastly, never use exterior caulks in the shower or the tub. This is a very important rule to follow. Exterior caulks have their place and are effective in other areas of the home, but they won’t stand up to the demands required for a shower or a tub.
Caulking your shower stall or your shower surround
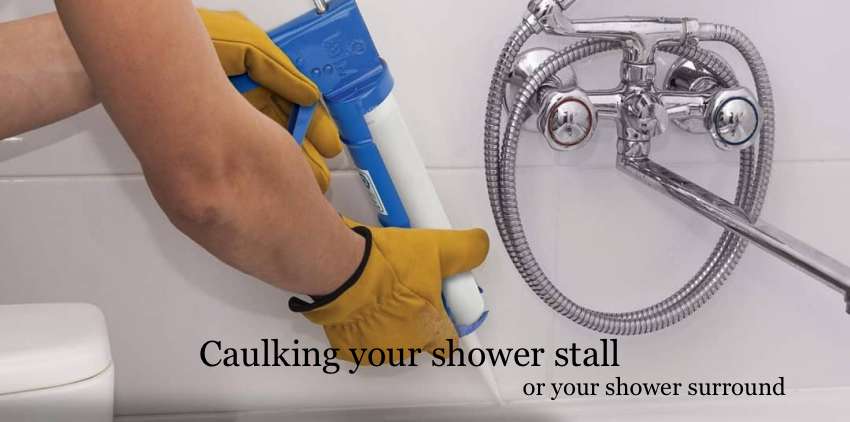
Now that you know what the best caulk for your shower is, it’s time to get to work. The first thing you’ll need to do is to remove all the loose caulk in your shower. This step isn’t necessary if you’re not re-caulking. Just for a little review, if you don’t completely know what the purpose of caulk is, it’s used to keep the water in a shower or tub from rising up under the tile, the shower pan, or the joints. When the water is able to get under, mold and mildew will start to grow, and eventually, you’ll need to re-caulk your shower again.
To remove all the loose caulk, use a scraping tool. Once it has all been removed, you’ll want to use a utility knife to cut out the old caulk. Utility knives work best for removing all kinds of caulk. You can also use a putty knife too. The most important thing to remember is to keep your blade low so you don’t scratch the tile or the shower pan.
If you have a hard time removing the caulk, a heat gun or a hair dryer is a very useful tool in this situation. Once you use the heat gun to soften the caulk, you should be able to remove it much easier. After all the caulk has been successfully removed, get yourself a cloth and clean the joint with denatured alcohol. This solution will help you wipe away all the dirt, grease, and leftover caulk.
Although denatured alcohol is a good product, it won’t eliminate mildew. If you notice after removing the old caulk that’s this is a problem, you’ll want to use some sort of concentrated mildew killer to tackle the issue.
Now that you have fully cleaned the joint, you’ll want to figure out whether you’re replacing the caulk because of a leak or because it’s just old. If you are replacing the caulk because of a leak, let the area sit untouched for 24 hours. This will dry everything out. You can even point a fan towards the joint to speed things up. It’s important to note that if you are using silicone caulk, you must wait until the area is fully dry. If you’re using acrylic latex, you can cheat a little. Once the joint is completely dry, you can then re-caulk the joint.
Follow these steps when caulking you’re your shower or tub:
- Get yourself a bucket of water and a sponge if you are using acrylic latex caulk or paper towels if you are using silicone caulk. This will allow you to remove any excess caulk.
- If you’re using a caulking gun, stick the squeeze tube into the gun. However, a caulking gun is not necessary. Some people find the squeeze tubes to be a lot more accurate and easier to use.
- You’ll now want to cut a hole in the end of your squeeze tube, but don’t cut too big of a hole. This will oftentimes lead to over-caulking and, eventually, a mess.
- Apply your caulk with a steady hand. You’ll want to do your inner shower before you do the outer portion, and you’ll want to make sure you do the whole job at once. This is important, especially if you’re using silicone caulk.
- After you have finished the job, make sure you let the caulk dry for at least 12 hours before you shower or take a bath.

- Painting Over Powder Coat and What You Need to Know - February 1, 2022
- How to Get Rid of Humidity in a Basement Without a Dehumidifier - December 17, 2021
- How to Fix a Crack in Drywall That Keeps Coming Back - September 22, 2021
Joe M.
Wednesday 26th of October 2022
Out of the three most common types of caulk, which is the most widely used for a 3 piece acrylic shower wall surround where it meets up with sheetrock?