When you are working on a carpentry project, one of the most important phases is the finishing phase. That’s the part where you coat and protect the wood, giving it extra durability, water resistance, and yes, some extra shine and beauty. Products like stain, lacquer, polyurethane, resin, and shellac are the usual go-to substances used to complete a wood-working project.
However, not all types of lumber are the best wood for staining. In fact, some don’t look good at all once they are stained. In this guide, we will talk about what wood takes stain best. That way, you will know what you are getting into, and you will be fully aware of the extra steps you may need to take to get the wood you are using to look good with that professional sheen you want.
Wood Grain and Fibers
 The best woods will absorb wood stain while maintaining color and consistency. However, some types of lumber cannot be stained using the normal process, or they become splotchy, discolored in certain areas, and generally unappealing as far as their visual appearance.
Why do some types of wood accept stain better? The answer lies in the actual underlying structure of the wood cells and fibers.
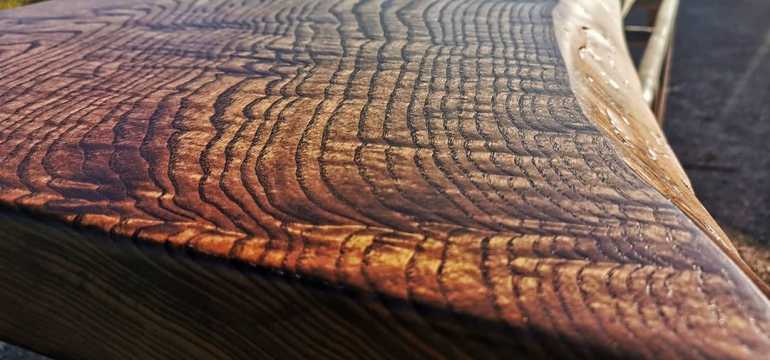
Technically, wood grain is the pattern of the fibers, their arrangement within the tree. Within hardwoods, there are vessels that carry water and nutrients throughout the tree. When those vessels are interrupted or cut, the resulting openings are known as pores. The pores also affect the way the wood grain reacts to stains and finishes. They can shrink or expand when exposed to moisture or a substance like a wood stain.
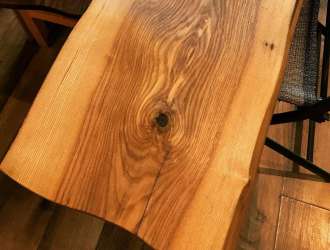
A rougher, more open wood with broader pores, is typically called coarse grain. Wood with tinier cells is labeled as fine grain. As a general rule, the straighter the grain of the wood is, the stronger and more durable the lumber will be. In addition, the more even the grain, the tougher and stronger the wood usually is.
Large pores or uneven grain can be a problem when you are trying to stain a piece of wood. The open grain areas can suck in too much stain, creating dark streaks or splotches that are very unsightly and tough to fix. The closed-cell areas or fine-grained sections absorb less stain and stay light in color.
Despite the beautiful, attractive grain that some pieces of wood may have, applying stain can actually ruin that look if you don’t follow the right process.
What Wood Takes Stain Best?
Oak
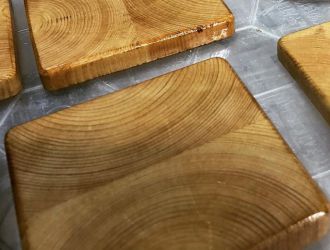
If you are looking for wood that accepts stain very well, you will want to look for those with a more consistent grain and fewer imperfect areas. Oak is one of the best and easiest woods to stain; it accepts the color well and allows it to absorb evenly.
It has large, strong cells that accept the stain without damage, and it also has contrasting bands of latewood and earlywood that provide a beautiful contrast once they are stained. That lovely contrast is thanks to the arrangement of the vessels within the tree.
Pine
Pine, on the other hand, is notorious for being difficult to stain. As a result, pine is usually sealed with shellac instead; or if it is stained, only a light stain is used after conditioning. Pine does not stain well because it is a softer type of hardwood.
The softer the wood, the more likely it is to look odd and blotchy when stained. So it is best to avoid the softwoods for creating your project if you are planning to stain it later.
Fir, cedar, maple, birch, and spruce have a similar cell structure to that of pine, so when you try to stain them, they don’t look very attractive. In fact, they can appear downright boring or, in the worst cases, ugly. Or, in other scenarios, the softness of the wood yields a very fragile cell structure, which can collapse when stained. The stain will then reveal every tiny blemish in the wood, including sanding marks, scuffs, dents, abrasions, and more.
Cherry
Cherry is already a beautiful wood that you probably don’t need to stain, but if you do, the process could be complicated. It tends to be rather unfriendly to stain, like pine and poplar.
Besides, the lovely deep red of cherry should be embraced and maintained, not covered up with dyes and stains. A nice gel finish should protect it and show it off well at the same time.
Ash Wood
Chestnut, like oak, accepts stain well and yields an attractive result. Ash is another popular wood for staining. Red oak, white oak, hickory, ash, walnut, and chestnut are all stain-friendly choices for furniture and floors.
You can also stain mahogany, and it tends to yield a beautifully dark, rich color. Alder, cedar, and pink lyptus accept dark stain well if you are looking for a deeper color.
How to Stain Wood That Doesn’t Take Stain Well
First of all, we always recommend that you experiment on some scrap pieces of wood first, before you dive in and begin applying sealer or stain to your project. If you are new to the finishing process, it is important to go through those extra steps of testing so you can get a feel for how to treat the wooden project you are working on.
Pre-Stain and Wood Conditioners
 First of all, you should be aware that a number of well-known manufacturers of wood finishes also produce a selection of wood conditioners or pre-stains. These wood conditioners help to treat and even out the wood grain and surface texture so that when you apply your coats of actual wood stain, the end result is much smoother and more unified, without that unsightly splotchiness that you’re trying to avoid.
A very popular brand of wood conditioner comes from Minwax, so be sure to check out the Minwax line of pre-stains if you are interested in using a pre-made, ready-to-go product on the wood you’re treating.
Wipe-On Oil Finish
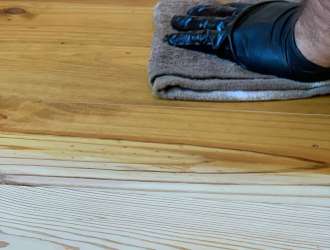
 As an alternative method, you could skip the pre-stain and wood conditioner and instead use a type of wipe-on oil as the sealer for the wood. This is an easy, natural option. The oil seeps in, saturating the wood fibers, sealing off some of those large open pores and providing a more even surface for the wood stain you will eventually apply. In addition to wipe-on oil finishes, you can also use de-waxed shellac or sanding sealer.
Keep in mind that if you seal the wood too heavily, you are going to have trouble getting the stain to stick. Try diluting the sealer you plan to use with a bit of mineral spirits, just to thin it out a little. Again, experimentation on scrap wood is extremely important if this is your first time going through this process.
When you are planning to stain wood, always be sure to do a light sanding first. Then stir the stain or pre-stain thoroughly in the can before you begin applying it. Stirring the product will ensure that all the pigment particles are evenly spread throughout. Apply your first coat and give the product several hours (or the amount of time recommended on the container) to thoroughly soak in a saturate the wood, and to dry or cure as needed.
To obtain a deeper color, or to add more protection to the piece, you can apply additional coats of stain, but do not apply more stain or a protective finish like polyurethane before the stain has thoroughly dried. Also, don’t leave the excess stain on top of the wood to dry, thinking that it will deepen the color. It will not; in fact, it will eventually peel or flake off. You need to wipe away any excess for every coat of stain that you add.
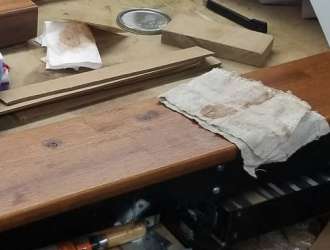
One more note: if you are refurbishing and refinishing an old piece of furniture, such as an antique or a vintage piece, you will want to take off any hardware before you get started. So you will need to remove handles, drawer pulls, knobs, trim, and hinges. If you do not remove these parts, they may be exposed to the finishing products, and as a result, they could become permanently discolored and damaged.
Type of Wood Stain to Use
Let’s say that you are working with a tough type of wood that is unusually prone to blotches. You have done the work of pre-staining it or sealing it, and now you are ready to move on to the finishing stage.
Since you have already treated the wood, you probably should not use a lighter water-based stain or something that is supposed to soak into the wood. Instead, opt for a gel stain or a thicker, heavier-bodied stain. A heavy stain or gel stain carries more pigment, which can even out any residual splotchiness issues that may slip through despite your attempt to condition the wood.
There are a number of types of wood that accept stain gracefully and yield a gorgeous result. However, there are also several types of wood that do not handle being stained very well at all. You can go easy on yourself and choose the best wood for staining, thus cutting out some extra steps from your project. Or, if you have your heart set on using a particular type of wood, and it just doesn’t accept stain well, at least you will be mentally prepared for the process to take a little longer. You can purchase the products and put in the extra effort to get the result and color you want.

- How to Cut Lexan - September 25, 2020
- Mineral Spirits vs. Mineral Oil - September 25, 2020
- Shellac vs. Polyurethane - September 24, 2020
Roy Rogers
Saturday 4th of June 2022
Wow. Wish I read this before I opted for pine board moulding around my new slider. I've already ruined the pine by staining so I'll just paint it instead.
Barbara
Friday 3rd of December 2021
Wow...I haven't started working with my very, large free-standing CORNER birch kitchen cabinet yet...BUT I am SO GLAD that I read ALL this information FIRST!!!! I have been doing wood staining for YEARS, but mostly on old furniture which I am "re-habbing".
Now I am scared silly about starting my project with this birch corner closet!!!!!!! Yikes...SO many things to know!!!! But thank you, thank you for this very intelligent article that covers EVERYTHING that I need to know!!!!!!
Very sincerely, Barbara