You might think that staining wood is fairly straightforward and that it is essentially the same process no matter what type of lumber you are dealing with. However, that is not always the case. One type of wood that is notoriously problematic to stain is poplar.
If you’re interested in staining poplar for an upcoming project, it is a good idea to do some thorough research first, so you understand the nature of this wood and why it can be a bit difficult to achieve the look you want. Learn all about staining poplar, the features of poplar wood, and how to get a smooth, beautiful look for your poplar project.
Features of Poplar Wood
 In this guide, we’re going to discuss a few qualities of poplar that can affect how well it does with staining. If you’re wondering, “Does poplar stain well?” stay tuned; we’ll explain why staining poplar can be tricky due to its softer nature and its texture.
First, however, a few fun facts about poplar. You may encounter various names for this type of tree or wood, including tulip tree, yellow tulipwood, tulip poplar, whitewood, or canoe wood. The “tulip” aspect of the name refers to the beautiful flowers that bloom on healthy poplars in the springtime. You may be surprised to learn that the poplar typically sold in stores is actually kin to the magnolia family of trees, hence the lovely blooms.
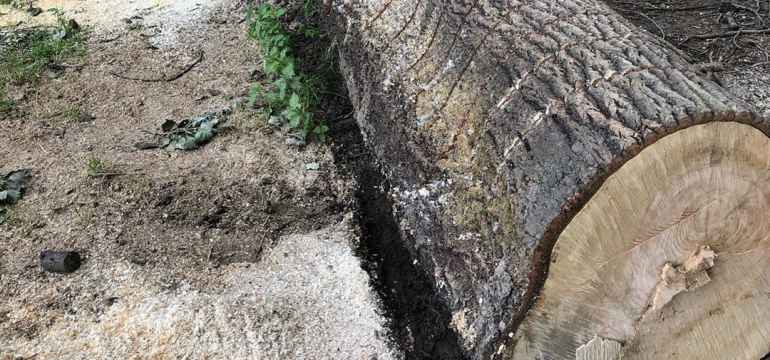
Because this tree grows tall and straight, without any lower branches, it yields plenty of nice lumber in various thicknesses or widths. The lack of low-down branches means that the lumber is also fairly knot-free. The result is a nice straight, even grain that is often appealing to buyers.
Softness
 Poplar is classified as a hardwood. However, in some ways, it has more in common with softwoods. To put this into some perspective, cedar is classified as a softwood, and the hardness rating for some species of cedar is higher than that of poplar.
So why even classify poplars as hardwoods? Well, according to the official definition of a hardwood, it is a type of wood from a deciduous tree, which is a tree that loses its leaves during the winter. Evergreens or conifers, which keep their leaves throughout the winter, are not deciduous, nor are they hardwoods. By that definition, a poplar tree, which sheds its leaves in the fall and regrows them in the spring, is a deciduous tree and, therefore, a hardwood, despite the softer nature of its lumber.
The hardness of wood is measured in pound-feet (lb-ft). For poplar, the score is typically 540 lb-ft. That’s lower than the rating of softwoods cedar and fir, but higher than white pine.
Appearance
 Many people find poplar a tempting wood to use for cabinets, furniture, and more. They like its yellow-brown or creamy yellow color, and they appreciate the nice parallel grain. However, poplar has low density, and since it’s so porous, it can be tough to work with. It doesn’t yield the crisp edges that some other types of lumber can allow you to achieve.
Because of these issues, and the difficulty of giving poplar a really clean finished look, it is often used for hidden elements within homes, furniture, and other projects. In furniture, it might be part of the frame of a dresser, while a more attractive wood is used for the outer portions of the piece. Since it is lightweight yet durable, poplar is often made into shipping crates, storage crates, or pallets. These items don’t have to look good in order to be useful, so they are perfect for this type of lumber.
Since poplar does not handle finishes very well, it isn’t usually the front-facing wood in a home. However, sometimes you’ll see it used for ceilings, headboards, and other elements that are left raw and unfinished. A vaulted poplar ceiling can look very attractive and beachy in a home.
Does Poplar Stain Well?
The answer is usually no, unfortunately. Because of its color, texture, and porosity, it just doesn’t hold the stain well. The stain will soak it unevenly, and the end result is often a dull, blotchy product.
Poplar is known as a paint-grade wood, which means that it handles paint really well. This is primarily because paint sits on the surface of the wood and doesn’t need to soak in as stain does. And the qualities that make poplar ideal for painting make it an iffy selection if you’re planning to use wood stain.
However, there are some things you can do to work around this problem, so if you have your heart set on using poplar for a project, don’t lose hope. It will take some extra work, though, so if you want a type of wood that is quick and easy to stain, you may want to ditch the poplar lumber and go with something else instead.
Some people choose poplar because it looks pretty good in its raw, natural state. It’s also fairly inexpensive compared to other woods, especially woods like cherry that are often used for gorgeous furniture and cabinets. If you’re willing to put in extra time and labor to get that lower price, poplar just might be the right wood for you.
How to Stain Poplar
 There are several steps involved if you want to have stained poplar wood. The key thing is to do everything thoroughly and carefully throughout each step.
Choose Your Wood
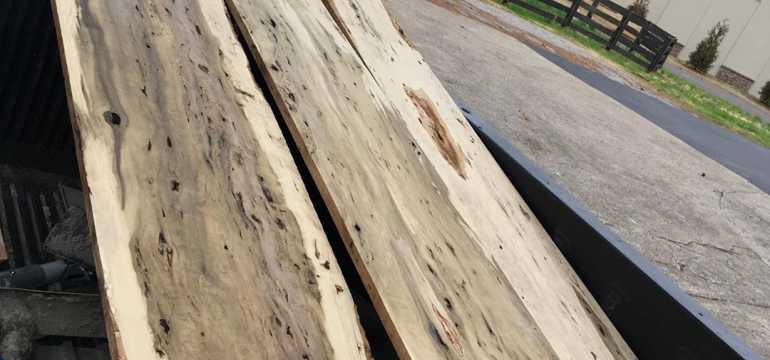
If you’re committed to using poplar, you need to know a few things about the wood selection. There are differences in grade, hardness, and color within the poplar family. Don’t choose the paler or whiter versions of poplar, because those types are even softer and will yield a much blotchier look if you are trying to stain them. Instead, search for dark yellow poplar, gray poplar, or poplar with a greenish hue. The darker the color, the harder the wood and the better the stain will hold.
Find a Work Space
First of all, you need an area that is well-ventilated. Anytime you’re working with stains, paints, varnishes, and similar chemicals, you need to ensure that you are in an area with plenty of airflow. Ideally, you should also wear rubber gloves and a mask or respirator to protect your lungs. The mask can filter out some fumes, and it also keeps you from inhaling tiny particles of wood. You may also want to wear a pair of goggles for added eye protection. To ensure that your work area has adequate ventilation, open windows or doors and use fans to circulate the air. Any safety supplies can be easily obtained from a local hardware or home improvement store.
Save the Extra Bits
When you cut the pieces of poplar wood to the right size, you may end up with some spare pieces and scraps. It is a good idea to save those extra bits. Use them to test your stain on. If you bought your wood pre-cut, it might be a good idea to purchase an extra piece or two of the same poplar, purely for testing purposes. Once you have practiced staining those extra strips or scraps, you’ll be better prepared for staining the bigger pieces for your project. It’s one more safeguard to keep your entire piece of furniture or another item from being ruined by a bad stain job.
You can also bring scraps of poplar wood into a local paint or stain shop and work with the staff there to get a custom stain color that works perfectly with the wood you bought and the end result you want to see. While this step takes more time, it can also yield a better-finished product in the end. A custom stain will be exactly the shade you want.
Sand the Poplar Wood
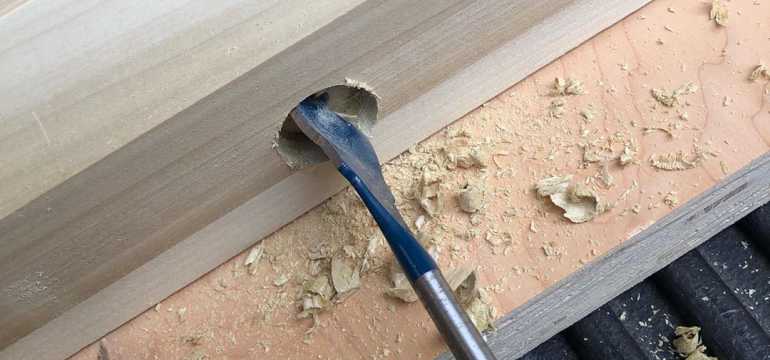
As you probably suspected, the next step is to sand the poplar. Few people would call sanding their favorite part of a project, but it is necessary. In this case, the sandpaper roughens up the surface of the poplar, preparing its surface to accept the product you’re going to apply. As you are sanding, be sure to work with the grain. This can sometimes be tough to determine, but if you look closely, you will see lines in the piece of wood you are treating. You want to sand and wipe parallel to those lines.
Some suggest 80-grit sandpaper to start with before moving to 180 or 220 grit, but it’s up to you and also depends on the level of smoothness your wood has when you begin working with it.
Select the Best Stain for Poplar Wood
 The best stain for poplar wood is not a penetrating stain or one that needs to soak in deeply. For this wood, you will need a gel stain or a wipe-on stain. Minwax stain on poplar works fairly well if you are using the gel stain, but you should avoid the Minwax penetrating stain for poplar projects.
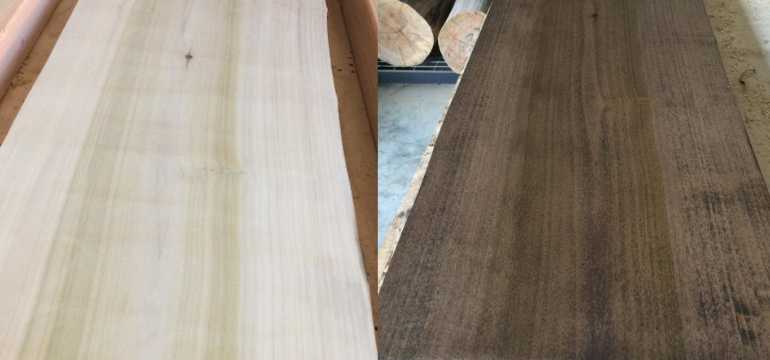
Minwax also offers a pre-stain wood conditioner, which can help woods like poplar to look less blotchy when a regular stain is applied. You can purchase a small container of the pre-stain wood conditioner and try it out on a couple of your poplar samples. Apply the pre-stain, and then, once it has dried, try a regular Minwax stain on poplar to see what happens.
In one test, the final result using the Minwax pre-stain was a dramatic two-toned effect, which might be pleasing to some users and problematic for others. It really all depends on the look you want, and whether you are willing to accept an aesthetic that’s a little different from what is normal or traditional. The type of project you’re creating also makes a difference, whether it’s cabinetry, a headboard, a ceiling, or a piece of furniture.
Other manufacturers specializing in stain, finish, and paint also supply stain controllers. These products may also be called wood conditioner or pre-stain sealer. You can test a couple of commercial stain controllers or find a recipe online to make your own stain controllers. Treat the wood with these products to give it the best chance of an attractive final appearance once you add the actual stain.
Some woodworkers create their own stain controller using three parts paint thinner and one part clear gel varnish. Swipe this mixture over the poplar wood you plan to use, saturating the wood thoroughly. Let it sit for a minute or two, and then clean away excess with a dry rag.
Clean the Wood
Once you let the pieces dry overnight, use water and dish soap to cleanse the poplar. This process opens up the cells in the top layer of the wood. Any liquid soap or mild dish detergent in your kitchen should do the trick, but you should avoid the harsher types of soap designed to cut grease. Use about a teaspoon of milder dish detergent in a bowl of warm water. With a clean rag, wipe down the entire piece of poplar.
As you finish cleaning the wood and allow it to dry, you’ll notice that certain areas stay wet longer than others. These sections are the danger zones, the areas most likely to streak and blotch when you apply the stain.
Dye the Wood and Spot-Treat with Gel Stain
Use TransFast Medium Brown Water-Based Dye all over the wood’s surface, wiping off any excess and allowing a drying period of a few hours.
When it’s dry, you’ll notice that those darker areas are even more prominent. Don’t panic, because this is what you want; you need these areas to be visible so you can effectively spot-treat them. Cover these “blotch danger zones” with a clear gel stain or an extra coat of quality varnish.
Stain the Poplar
After that, your wood is prepped and ready to be stained using the gel stain of your choice. Since you have already selectively treated the blotch-prone areas, it’s less likely that those spots will become more dramatic and ruin the overall look. You must be sure that the wood is completely dry before you apply any stain.
If you’re creating a piece of furniture, consider going the extra step and using some amber shellac for extra water resistance and durability. A coal of oil-based satin polyurethane would be a good idea as well, especially if you’re creating a table of some kind where drinks might rest.
Dispose of Rags Safely
Keep in mind that gel stains are flammable. The rags and cloths that you have used can catch fire if they are placed near heat or sparks. Keep these items away from extreme heat or any source of sparks. Allow them to dry thoroughly before placing them in the trash, or seal them in a metal bucket full of cold water and take them to a hazardous waste facility near your home. If you’re unsure which disposal process is preferred, call your local facility that handles hazardous waste and ask them about best practices.
What If Staining Poplar Doesn’t Work?
When it is correctly prepared and treated, stained poplar wood can sometimes look interesting and beautiful. However, in other cases, the end result is a blotchy mess streaked with dark gray or purple. The good news is that if you end up with a staining result that you really, really don’t like, you can always alter your plan and paint over the poplar wood instead.
Here’s how to do it. Sand down the project again, then wipe it clean to get off all the sanding dust and particulates. After that, apply a high-quality primer to the piece, making sure that you cover every bit of the surface. Once the primer has dried, apply a nice even coat of paint. That coat will need to dry, and then you can add another coat for a more uniform, durable result.
The process of staining poplar is long, and it can be tricky, but once you’ve done it, you will have the experience you need to do it again, even better. If you’re not a fan of the results for this project, try different products, such as dyes and stains, the next time you purchase poplar wood for a project. You can ask friends or relatives about their favorite gel stains for poplar, or look online to find out which products are most highly rated and achieve the most attractive results.

- How to Cut Lexan - September 25, 2020
- Mineral Spirits vs. Mineral Oil - September 25, 2020
- Shellac vs. Polyurethane - September 24, 2020
Jennifer
Wednesday 2nd of March 2022
Great article. I bought about 1500 LF of poplar before I read this, but have been sanding, using wood conditioner, then staining. I found through trial and error that the greenest boards look great, almost like walnut (with "special walnut" stain). The white boards end up splotchy no matter how much wood conditioner I use.
I have been using a water based penetrating stain though. Funny thing is, I like the walnut look, my boyfriend likes the more rustic look, so we've still been using the whiter boards for baseboards where there is a lot of furniture, and the green boards for door and window jams and trim. Our house is a prow front log home style architecture (without the logs) and sort of modern rustic, so it works out ok. I'm down to the last 200 LF of trim to do, so I am not sure if I should change stains now, but I will definitely keep your advice in mind for the future.