If you’ve got a mold problem in your bathroom, taking a shower in your own home can become a dreaded and disgusting process instead of a relaxing and cleansing one. The shower area is most prone to the onslaught of mildew or mold, thanks to its constant exposure to high levels of moisture and humidity.
Are you experiencing mold issues in your home’s bathrooms? Find out how to eradicate mildew, how to get rid of mold in a shower, when to redo your shower grout, and how to prevent further mold and moisture problems from causing you grief.
How to Get Rid of Mildew in a Shower
You can purchase a number of different cleaning products at your local grocery store or home supply store. A number of popular cleaning brands provide solutions that are specifically tailored to the eradication of mildew from your shower area. Usually, all you have to do is spray the product on affected areas, possibly let it sit for a bit, and then rinse the solution away, along with the mold.
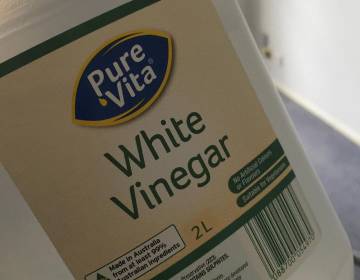
White vinegar
However, if you prefer a more home-grown or natural approach, you can try white vinegar to get rid of mildew in your shower. The vinegar should sit on the surface for a while. Depending on the severity of the mildew problem, you may want to leave it in place for up to two hours.
Once the white vinegar has had time to work, use a sponge, a foam scrubbing brush, or a damp cloth to rinse and wipe away the excess. Finish up by pouring or spraying water on the affected area to rinse away any residue that remains.
How to Clean Moldy Shower Grout
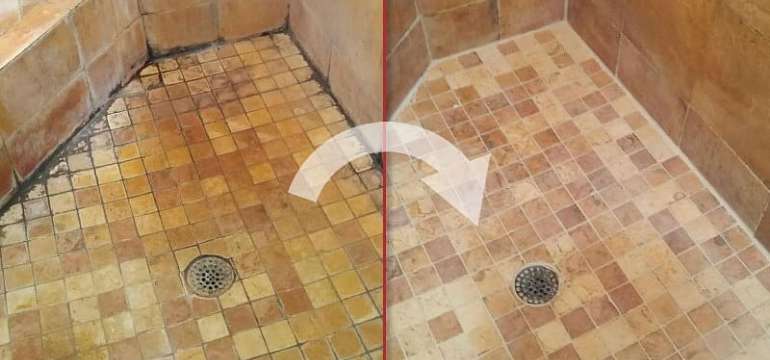
The grout between the tiles in your shower is porous, which makes it particularly prone to mold growth. Moisture can get into those tiny holes, forming the perfect pocket of dampness in which mold spores can take root. The more mold is present in your shower, the worse it will look and smell. To prevent the mold from spreading, moving deeper into the walls, and possibly making your family sick from spore exposure, you need to take action.
Check Your Shower Tiles
Before you start scrubbing with strong chemicals, however, you need to check the type of tile in your bathroom and find out what chemicals are safe to use around it. Some cleaning agents will blur the pattern or destroy the patina of your shower tiles, so it’s important to know what finished you have in your shower and how the cleaning agent you plan to use will affect them.
Protect Yourself
In addition, make sure you’re wearing eye protection, a mask, and gloves before you begin work. If possible, open a bathroom window for ventilation; if not, turn on the bathroom fan.
Apply Bleach or Baking Soda Paste
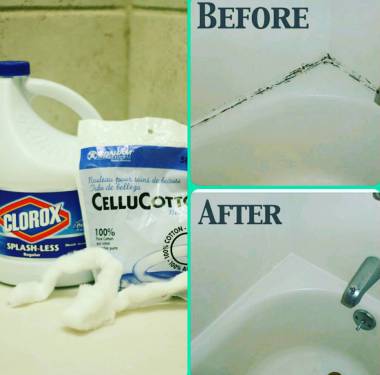
Bleach and cotton beauty coils
Chlorine bleach is one sure-fire way to zap mold in your grout. You can brush or scrub it onto the grout directly, working on limited areas, one at a time, and letting the bleach soak in for half an hour on each new section. (You can use cotton coils/pads for this task.) After the requisite amount of soaking time, use warm water to rinse the bleach off.

Baking soda paste
Another excellent cleaning agent you can use on the mold in your shower grout is baking soda paste. Mix 1/2 cup of hydrogen peroxide with 1/2 cup of baking soda until you get a nice malleable paste. Spread the paste-like cake icing, right onto the strips of moldy grout. After ten minutes, use a scrub brush or a brush with bristles to scour away the paste. Rinse the areas with water and let them dry. Is the mold gone? If not, repeat the process as necessary.
For deeper cleaning inside all those little pores of the grout, apply the baking soda paste as normal, then spray a bit of hydrogen peroxide over the paste so it will fizz. The foaming paste should penetrate deeper into the grout for more thorough cleaning.
Redo the Shower Grout
In some cases, the mold problem in a shower is so bad, so extensive, that you really have no choice but to rip out all the grout and begin again, starting from scratch. If this is your situation, you’ll need a grout removal tool with a triangular tip, as well as a Bosch multitool or a grout saw. You may want to protect your tiles by covering them with painter’s tape during this phase of the process.
Scrape out any grout that has been affected by the mold problem, going as deep and as far as necessary to rid your shower area of the mold completely. Discard all the crumbly pieces of grout and wipe away any remaining grout dust or residue. After that, pass over the area with a vacuum to remove even more excess.
Fill in the cracks between the tiles with fresh grout, using a grout float to ensure that the new grout mixture gets deeply inside those crevices. Wipe away excess and smooth out bumps or ridges until it’s all level and perfect. Let the grout dry undisturbed for a week or so before you seal it.
Getting Black Mold Out of a Shower
Black mold is a more serious variety than your average household mold. This type of mold can be very toxic, and it can wreak havoc, not only with your home but with your health as well. Keep your family safe and minimize risk by learning how to identify it and how to eradicate it without compromising your own health or that of family members.
What Is Black Mold?
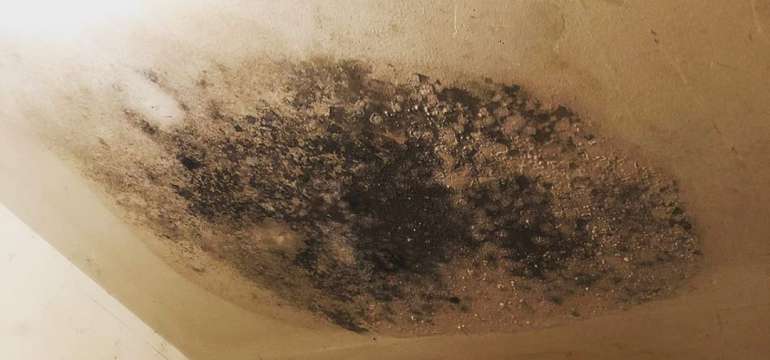
Black mold is usually called toxic mold. It goes beyond the gray or pink mold and mildew that you might normally encounter in your shower area as part of the increased humidity of that zone. Black mold is usually thicker, with very dark spots throughout, surrounded by brown or gray rings.
How to Identify Black Mold in a Shower
How can you determine if the mold in your bathroom or shower stall is regular mold or toxic black mold? Here are a few key signs to be aware of.
The Smell
Black mold has a distinct earthy odor. It becomes strong and noticeable very quickly. However, like many other people, you may have grown accustomed to the smell because you live in your home. If you’re unsure about the presence of black mold, or about an odor that seems fairly mild to you, call in a friend or someone else who doesn’t live in your home, and have them take a sniff. They may be able to perceive a strong mold odor that you’ve become used to.
The Appearance
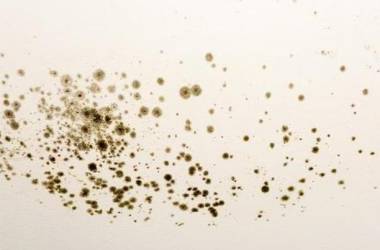 As previously mentioned, black mold has very dark or black splotches or circles, often surrounded by gray or brown rings. You may also notice water stains as the mold encroaches, creeping outward from the area where it began. Some varieties of this mold have flecks of orange, green, white, or brown within the darker spots.
Keep in mind that black mold often remains invisible under the plaster, wallpaper, or drywall. Take immediate action if you notice water circles on the ceiling, dampness of the drywall, or drips from one level of your home to another. If you address the leaks or moisture quickly, you may be able to prevent the onslaught of black mold.
The Symptoms
The longer black mold is present in your home, the more likely it is that you and any other residents may begin to show symptoms of exposure. If you suspect that black mold may be growing behind your shower tiles or shower insert, consider whether or not you’ve experienced any of the following symptoms: skin irritation, coughing, headaches, sneezing, itchy skin, or watery, irritated eyes. The mold spores can cling to your skin and eyes or enter your lungs, causing these types of symptoms.
Killing Black Mold in a Shower
Once you’ve determined that the mold behind your shower/tub insert, behind your tiles, or on the shower ceiling is actually black mold, it’s time to eradicate it from your home.
Prevent the Spread of Mold Spores
First of all, keep in mind that when you disturb the mold, its spores could spread. You need to seal off the entire affected area, closing doors and taping over cracks or vents. Be sure to protect yourself by wearing an effective dust mask, goggles, gloves, and clothing with long sleeves and long pants to protect your skin from irritation by the spores.
Scrub the Mold
You may think that scraping off the mold while it’s dry is a good idea. After all, adding moisture will only make the existing problem worse, right? However, in this case, it’s a good idea to do the job while the area is wet since the mold spores will be heavier and less likely to float around and take root in another area of the room.
Scrub any areas that you can with soap, water, and a soft brush. If you’re working with tile, grout, and drywall, you’ll have to be gentle so as not to destroy the materials. Follow up the cleaning session by spraying the entire area liberally with a powerful disinfectant.
Identify the Cause
Keep in mind that simply scrubbing the area may not be enough. In some cases, you’ll need to take down tiles, replace drywall, and get into the bathroom walls to address the source of the problem. Prioritize fixing the leak or whatever other issue is causing the mold growth; because unless you fix that underlying issue, you’re going to continue having problem after problem with mold in that space.
In some cases, parts of the tile, drywall, baseboards, or other elements may be so thoroughly contaminated that they are unusable. You can’t possibly clean all the mold off them. In those situations, it’s best to carefully seal the ruined, mold-infested pieces into airtight plastic bags and throw them away.
Spending the extra money to replace those components may be difficult, but it’s much better than going through the whole cleaning process only to find that you didn’t get all the mold out, and it’s back with a vengeance.
Spray Disinfectants
As mentioned, you’ll need to treat the cleansed area with a powerful disinfectant to kill any remaining spores and hopefully discourage the resurgence of mold. You can purchase disinfectants designed for this very purpose.
However, if you’re into more natural, earth-friendly methods, there are several more organic options you could try.
White vinegar works well for this purpose. Put full-strength white vinegar in a bottle and spray it in all the areas where you scrubbed away mold. Avoid using bleach due to the respiratory distress it can cause.
Hydrogen peroxide is another option. Try a 3% concentration in a spray bottle. After spraying it on and letting it sit for a quarter of an hour, wipe it off with a damp cloth.
Tea tree oil and grapefruit seed extract are also possible solutions for disinfecting an area once affected by black mold. Use 20 drops of grapefruit seed extract in two cups of water, or use one teaspoon of tea tree oil in one cup of water. In both cases, simply spray on the solution and leave it to dry.
Calling in Professional Assistance to Remove Black Mold
What if you take off a few tiles or open a small hole in the wall, only to find that the black mold problem is far more extensive than you thought? If the black mold has spread behind your shower walls and beyond, you may need a team of experts to come in and remove it. These professionals have the equipment to seal off rooms, to thoroughly eradicate the mold, and to clean the air afterwards.
How to Keep Mold Out of Your Shower
Once you’ve completely rid yourself of the mold problem in your shower, you need a strategy to keep it from coming back. If can identify that a leak was responsible for the problem, you can call a plumber or repair person to investigate and resolve that issue. But sometimes, other factors can be responsible for the slow spread of mold, whether it’s the nasty black mold or the more common kinds of gray and pink mold or mildew.
Install Better Ventilation
Every bathroom with a shower or tub in it should also have a functional fan. The fan sucks moist air out of the bathroom, helping everything stay a little drier. Over time, your bathroom fan may become less efficient, moving air weakly.
Consider cleaning or repairing it for better function, or replace it altogether with a newer, more effective model that can eliminate that unwanted moisture from the shower area.
Have the Area Tested
If you’ve had a black mold issue in the past, and your house is of an age where leaks and humidity are more likely, it’s not a bad idea to have your bathrooms checked for black mold spores every once in a while. The same companies who clean up black mold in your area may also be able to test for it.
Open Windows and Doors
Encourage airflow through the bathroom by leaving the door open all the time when the room is unoccupied. Whenever possible, open the bathroom window as well to maximize airflow, especially if it’s dry and sunny outside.
Prevention is obviously the best possible cure for the presence of mold or mildew in your shower. The drier you keep the area, the less chance there is of mold taking root.
Plus, there are disinfectant sprays you can use immediately after you shower or bathe, to kill off any mold spores in the vicinity. These sprays are typically labeled as being designed for mold and mildew prevention, so grab yourself a few bottles and use the spray daily or every other day.
Call the Experts
Remember, if you encounter persistent or dangerously toxic mold issues in any of your home’s rooms, including the bathroom shower areas, you should contact a professional. It’s okay to rely on the expertise of trained individuals when your own efforts aren’t quite a match for the mold.
After all, they have extra tools, supplies, and equipment that the average homeowner doesn’t have access to. The main goal is to ensure that you, your family, and your guests have a safe, healthy, and attractive place to shower and prepare for each new day.

- Using Borax in the Dishwasher - May 27, 2020
- Towel Ring Height and Other Fixtures: Proper Measurements - May 1, 2020
- Homemade Paint Removers for Every Surface - April 27, 2020