Woodworking and furniture craftsmanship can be tricky. You have to have the right tools, the right kind of wood for the project, and plenty of time for the longer stages of the process, like sanding and finishing. For many people, the sanding part of the job is the least favorite.
However, it is incredibly important if you want a truly beautiful, smooth result at the end of the project. In fact, many experts claim that sanding at the right stages is actually the most important element in achieving a truly professional-looking piece with the color and texture you want.
In this guide, we will talk about the necessity of sanding and the points at which you should sand during a project, specifically a piece of furniture. We will also discuss the important question, “Do you sand after staining?”
How Sanding Affects Color
 First, let’s talk about how sanding can affect wood when you do it between coats of stain or right before a coat of stain.
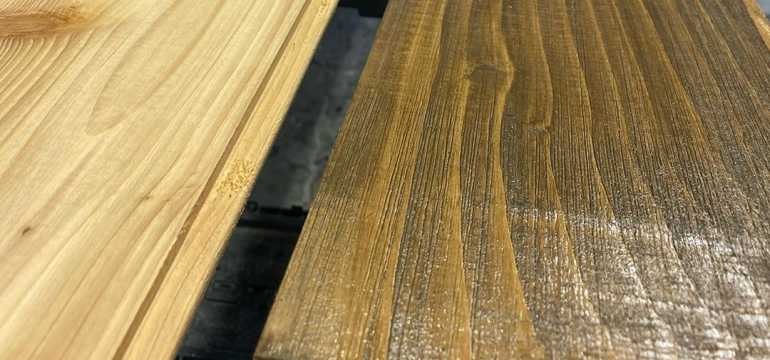
If you take a look at three different pieces of wood, all the same type of lumber, that have been sanding at different points during the finishing process, or with a different grit level of sandpaper, you will find that every one of them has a slightly different hue to the grain. By this, we can see that sanding after staining affects the finished product not only in terms of smoothness but in terms of color as well.
Imagine that the first piece of wood was sanded with 120-grit sandpaper. This coarser type of sandpaper leaves a different scratch pattern on the surface of the wood. The aggressive scratches of the sandpaper leave more scratches, so when you add stain on top of that, the pigment particles in the stain have more places to lodge and add that darkening effect.
With 150 or 180 sandpaper, there is less of a scratch pattern, fewer marks. So the stain doesn’t lodge and collects as heavily across the wood surface. So if you want additional control over your coloring, you can think about adjusting the type of sandpaper you are using.
One more thing to keep in mind is that sandpaper, while it has a smoothing effect overall, tends to open up the grain of the wood more, especially when you are using a coarser type of sandpaper. And that can sometimes reveal additional imperfections that you didn’t see before.
The higher or finer the grit, the more easily you can smooth out and eliminate all those little imperfections. If you want a darker coarser look, use a lower 120-grit sandpaper. If you want a very smooth, finely sanded surface, try a higher grit, like 150 or 180, or even higher depending on the project.
The Mechanics of Wood Stain
 A wood stain helps to protect your wooden project. It basically fills in the pores and sinks in between the fibers of the wood, creating a barrier against moisture, which could cause rot and weakening of the wood. Stain can also protect against the deteriorating effects of sunlight and strength the wood a bit more against impact and damage.
There are three major types of wood stains: resin, alkyd, and oil. There are also water-based stains available. When applied, the stain acts as a binder, securing the wood against humidity, rot, and other types of decay.
Sand thoroughly before you apply the first coat of stain. If you do not sand well, and you simply do a rough job of it, you will have exposed, open cells in the grain that soak in too much stain and create a much greater, darker contrast than you are probably looking for.
Sand a few times, with progressively finer grit sandpaper. Some people like to begin with 100 grit, then move to 150 grit, and end with a round of 220 grit. Try aluminum oxide sandpaper if you have a large surface to work over. Aluminum oxide sandpaper will self-sharpen as you use it.
Keep in mind that you will probably have to do a few coats of stain to provide the level of protection you want for your project. It’s important to wipe away excess stain as you apply each coat. That way, you won’t have sticky buildup to deal with when it’s time to move on and add a fresh layer.
Types of Wood
 The type of wood you are using for the project has an effect on how well the stain is accepted. Certain types of wood just don’t work well with traditional stains. They can become splotchy and discolored when you try to stain them. To counteract this effect, try using a pre-stain or conditioner on the wood before you stain it.
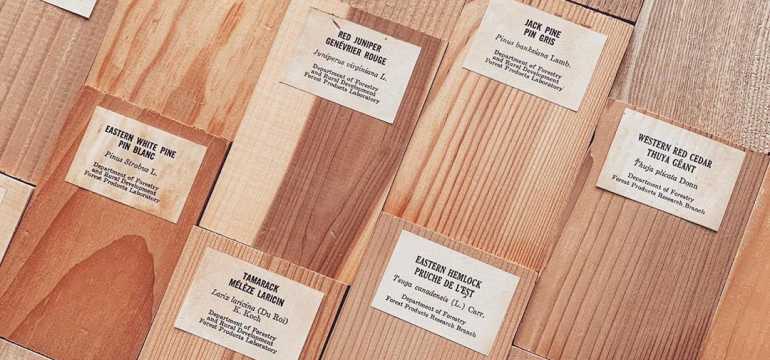
Cherry, mahogany, and similar woods don’t need much or any color, so it’s best to use light or transparent stains, so the natural grain and colors shine through. Oak, ash, and chestnut handle stain well, but wood such as maple, poplar, and birch do not handle stain very well at all. You should definitely use pre-stain or wood conditioning products for these types of lumber.
As far as wood conditioners go, many experts and DIYers swear by Minwax. Minwax tends to be the go-to name in pre-stains and pre-treatment, so if you are not sure where to begin, we would suggest starting out with a good Minwax wood conditioner, followed by a high-quality stain.
Pine is another species of tree whose natural and open grain may be more susceptible to a rough, unattractive look when you try to stain it. If you are planning to use white pine, limit yourself to light stains only. Another pro tip is to test your stain product on samples of the wood you are using, to see how it reacts. You can also practice using scrap lumber, so you get a feel for the process and products that seem to work best for you and yield the final result you want for the piece you are creating.
When you are staining, make sure you keep a wet edge and stain the entire project in one session without stopping if at all possible. Otherwise, you end up with darker overlapping edges where you ended and then picked up again.
Best Process for Sanding Stained Wood
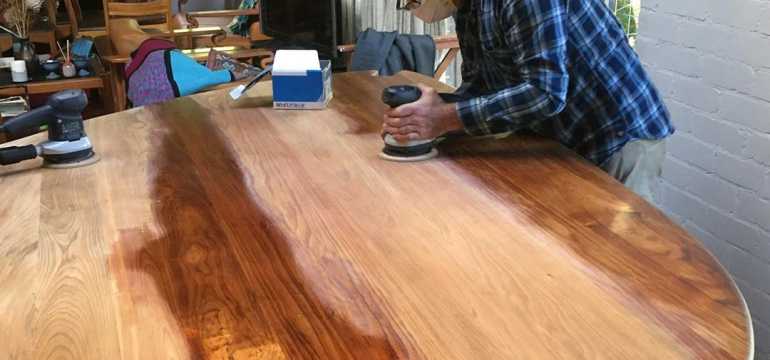 Sometimes, depending on the wood you are using or the type of stain you have purchased, you will find that the water component of the stain has lifted the grain again, making it more prominent and rendering the top surface of the wood rougher than you would like. To counteract this, you can sand a bit.
However, keep in mind that if you sand too much, you are going to lose the color and protective nature of the layer of stain that you just put on. It is best to sand very lightly, using very fine sandpaper like 220 grit. You can just lightly pass the sandpaper over the surface, working with the grain of the wood. If you are not sure how firmly to sand, watch a video that demonstrates the “scuff sanding” technique.
Once you have sanded the surface to your satisfaction, you may notice a fine layer of dust on the wood. Do not dampen a cloth and wipe the area. That will only raise the grain of the wood even more, and you will simply have to repeat the entire process again. Instead, wipe the surface down with a soft, dry cloth, or you can vacuum the surface carefully to remove that extra dust. Continue applying thin layers of stain and allow each layer to dry thoroughly before you add the next one.
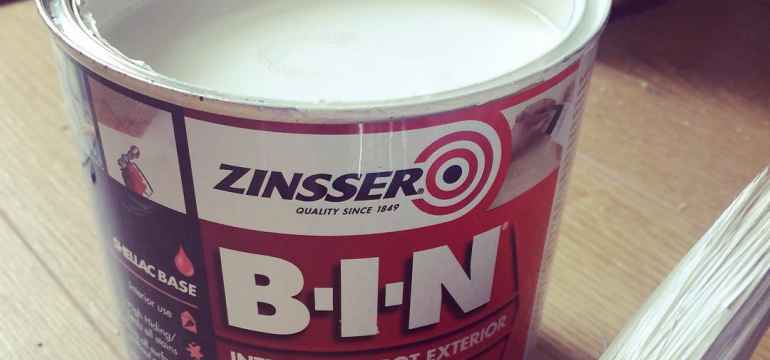
Some projects may be fine with only a coat of stain. Others will need additional protection from wear and the elements. For additional water resistance and durability, you can add a layer of polyurethane, shellac, lacquer, or some other type of sealer.
A Final Thought
Ultimately, our recommendation is that you avoid sanding after staining or simply use a very gentle scuff sanding method if you notice roughness. Be sure that you pay attention to the recommendations including on the label of the product you are using. Some manufacturers may include recommendations for sanding after staining or between coats, while others do not.
If this is one of your first woodworking projects, and you are not confident handling the staining or sanding portion of the project by yourself, we would suggest enlisting a knowledgeable friend or family member to help you through each stage. As you do more woodworking and carpentry projects, you will get a better feeling for how the wood should look and feel at each stage, and what you need to do to achieve the results you want.
Using Paint Instead of Wood Stain
 You may be wondering if you can simply use paint over the wood and leave it at that. That is certainly an option; however, it is important to note that paint does not provide the same kind of protection that stain does. Stain actually soaks into the wood, changing it chemically and preventing the encroachment of moisture, which could cause mold and decay.
Paint, on the other hand, sits on top of the wood surface. It can serve as a barrier to some moisture, especially if you use a water-resistant exterior paint, but it will eventually chip, thin, or flake off, and then the wood underneath will be completely vulnerable.

- How to Cut Lexan - September 25, 2020
- Mineral Spirits vs. Mineral Oil - September 25, 2020
- Shellac vs. Polyurethane - September 24, 2020